CLICK HERE FOR FREE BLOG LAYOUTS, LINK BUTTONS AND MORE! »
Showing posts with label Gothic. Show all posts

Saturday, December 4, 2010

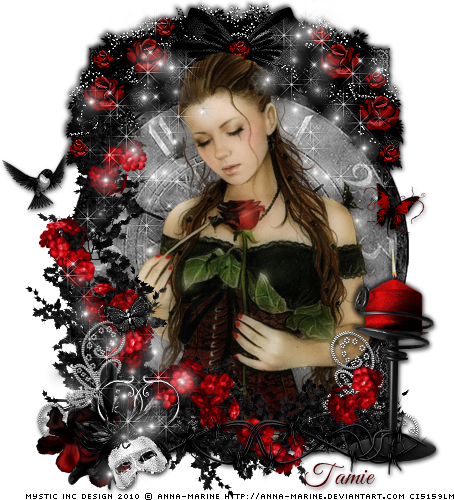
For Lost Loves


Artwork by Anna Marine and she is a pay to use artist, you can currently find her here at Creative Design Outlet. Please make sure that you have the appropriate CILM or Creative Design Outlet artist license to use the same tube as I do.

Supplies Needed:

Tube or image of choice
Scrap Kit: "Is it Love" by Addictive Pleasures and can be purchased here.
Font(s): Good Vibrations ROB

Here we go!

Open new image, 500x500, floodfill background with white.

Copy and paste frame 2, resize as necessary.

Copy and paste rose swag, resize.

Copy and paste vine, resize, duplicate, change blend mode to multiply, rote both layers to 90 degrees and move to bottom of frame.

Copy and paste flowers 2, resize, arrange on top of vines, colorize to a shade of red to your liking, duplicate and change blend mode to multiply, rotate both layers 90 degrees, move over vines across bottom.

Copya and paste clock, resize to just fit into flower layers, move on top of frame layer.

Copy and paste any other elements that you would like to use, resizing and rotating as you go.

Copy and paste the tube of your choice, duplicate, change blend mode to multiply, lower opacity to 48, add a gaussian blur of 5.

At this point, I usually resize if I need a smaller image. I also save both the original size and the smaller size images.

Add a new vector layer for your text - (I floodfilled mine with paper 16) To make it stand out, duplicate the layer, convert bottom layer to raster, expand by 2, floodfill with white.

Go back through to sharpen and add a drop shadow to your layers.

Add your copyright as the finishing touch.

Save your tag in your favorite format and you are done!!

This tutorial was written by Debbie (Mystic Inc Design), 2010. Any resemblance to any other tutorial is purely coincidental and not intended.

Sunday, November 14, 2010

Conjure Me


This tutorial was written for those that have a working knowledge of PSP (I use
Version 9).

Artwork by Anna Marine and she is a pay to use artist, you can currently find her here at Creative Design Outlet. Please make sure that you have the appropriate CILM or Creative Design Outlet artist license to use the same tube as I do.

Supplies Needed:

Tube or image of choice
Scrap Kit: "Living Dead Girl" by Grunge and Glitter and can be found here.
Mask(s): Weescotslass 128, and you can find that here.
Font(s): A&S Wizard

Here we go!

Open new image, 500x500, floodfill background with white.

Open frame 4, wire, and paper 2 - copy and paste frame as a new layer, resize. Use magic wand and select inside of frame, copy and paste paper 2 as a new layer, copy and paste wire as a new layer. Move all layers underneath frame.

Copy and paste paper 5, apply mask, move underneath all layers.

Open your tube or image of choice - copy and paste, arrange and resize to your liking, duplicate, change blend mode of top layer to multiply, lower opacity to 72, add gaussian blur of 5. Only dropshadow bottom layer.

Open your choice of extra goodies - copy and paste as new layers, resizing as you go. Don't forget the gargoyle!!

At this point, I usually resize if I need a smaller image. I also save both the original size and the smaller size images.

Add a new vector layer for your name, floodfill with paper 5, convert to raster layer. To make it stand out, use could use either Eye Candy Gradient Glow or duplicate the layer, convert bottom layer to raster, select all, use magic wand to select text, expand by 2, floodfill with black, drop shadow with white.

Go back through to sharpen and add a drop shadow to your layers.

Add your copyright as the finishing touch.

Save your tag in your favorite format and you are done!!

This tutorial was written by Debbie (Mystic Inc Design), 2010. Any resemblance to any other tutorial is purely coincidental and not intended.

Friday, September 10, 2010

Journey to the Past


This tutorial was written for those that have a working knowledge of PSP (I use
Version 9).

Artwork by Keith Garvey and he is a pay to use artist, you can currently find him here. Please make sure that you have the appropriate My PSP Tubes or PSP Tubes Emporium artist license to use the same tube as I do.

Supplies Needed:

Tube or image of choice
Scrap Kit: "Gothic Journey" by Created by Jill Scraps and can be purchased here.
Font(s): Vujahday Flourish

Here we go!

Open new image, 500x500, floodfill background with white.

Open GJ_mask1_cbj, copy and paste as a new layer, resize to your liking.

Open GJ_mask_cbj, copy and paste as new layer, resize to your liking. I recoloured mine, hue and saturation both set at 30.

Open GJ_traintracks_cbj, copy and paste as new layer, resize to your liking, I have mine rearranged, but it's up to you.

Open the grass, suitcase, passport, map, umbrella, moon, and railroad sign, copy and paste each as a new layer, resizing as you go. Some of the grass I did lower the opacity on.

Open GJ_wordart1_cbj, copy and paste as a new layer, resize to your liking. I recoloured mine, hue and saturation both set to 30.

Open your tube or image of choice - Copy and paste, arrange and resize to your liking, once again I recoloured mine to hue and saturation both set to 30. I also lowered the opacity to make her look a little "ghostish".

At this point, I usually resize if I need a smaller image. I also save both the original size and the smaller size images.

Add a new vector layer for your text, lower opacity to your liking.

Go back through to sharpen and add a drop shadow to your layers.

Add your copyright as the finishing touch.

Save your tag in your favorite format and you are done!!

This tutorial was written by Debbie (Mystic Inc Design), 2010. Any resemblance

to any other tutorial is purely coincidental and not intended.

Tuesday, December 22, 2009

Time Keeps All Lost Souls


This tutorial was written for those that have a working knowledge of PSP (I use Version 9).

Artwork by Scarlet Gothica and you can find her here, she is a free to use artist.

Supplies Needed:

Tube or image of choice
Scrapkit: "Funeral of Love" by Yarrow & Chaos Priestess and can be purchased here.
Mask(s): WSL220 by Weescotslass and you can find it here.
Font(s): Brush Script Std

Here we go!

Open a new image, 500 x 500 (we can resize later), flood fill with white.

Open frame 04Y - Copy, paste as a new layer, resize to fit.

Open paper 09Y - Copy, paste as a new layer, apply WSL220 mask, merge down, duplicate, flip, arrange both layers to completely surround frame.

Open Clock - Copy, paste as a new layer, move underneath frame layer and resize to just fit within frame, lower opacity to 40.

Open tube or image of choice - Copy, paste tube as new layer, make any resizing now. I duplicated my tube so I have one under the frame and one on top and erased anything that hung over the frame.

Open assortment of elements - Copy, paste each as a new layer, resizing and rotating to your liking.

At this point, I usually resize if I need a smaller image. I also save both the original size and the smaller size images.

Add a new vector layer for you name, I flood filled mine with paper 10Y. To make it stand out, use could use either Eye Candy or duplicate the layer, convert bottom layer to raster, select all, use magic wand to select text, expand by 2, floodfill with white.

Go back through to sharpen and add a drop shadow to your layers.

Add your copyright as the finishing touch.

Save your tag in your favorite format and you are done!!

This tutorial was written by Debbie (Mystic Inc Design), 2009. Any resemblance to any other tutorial is purely coincidental and not intended.

Fallen Angel


This tutorial was written for those that have a working knowledge of PSP (I use Version 9).

Artwork by Scarlet Gothica and you can find her here, she is a free to use artist.

Supplies Needed:

Tube or image of choice
Scrap Kit: "Black No.1" by Yarrow and can be purchased here.
Mask(s): WSL220 by Weescotslass and you can find it here.
Font(s): Petra Script EF - Regular

Here we go!

Open a new image, 500 x 500 (we can resize later), flood fill with white.

Open frame 07 - Copy, paste as a new layer, resize to fit.

Open paper 06 - Select inside of frame with magic wand, expand by 3, add new layer, floodfill with paper 06, select none, move underneath frame layer.

Open paper 08 - Copy, paste as a new layer, apply WSL220 mask, merge down.

Open wire - Copy, paste as a new layer, resize and move under frame background layer, duplicate, rotate, and move to top of frame, erasing any extra wire.

Open tube or image of choice - Copy, paste tube as new layer, make any resizing now. With the tube I used, I had to duplicate so the wings would be outside of the frame and I erased the bottom that hung over the frame also. Move one layer underneath the frame, and one on top.

Open assortment of elements - Copy, paste each as a new layer, resizing and rotating to your liking.

At this point, I usually resize if I need a smaller image. I also save both the original size and the smaller size images.

Add a new vector layer for you name, I flood filled mine with #808080, duplicate, convert top layer to raster, change blend mode to multiply to make it darker.

Go back through to sharpen and add a drop shadow to your layers.

Add your copyright as the finishing touch.

Save your tag in your favorite format and you are done!!

This tutorial was written by Debbie (Mystic Inc Design), 2009. Any resemblance to any other tutorial is purely coincidental and not intended.

Monday, December 21, 2009

Villainess of Love


This tutorial was written for those that have a working knowledge of PSP (I use Version 9).

Artwork by Scarlet Gothica and you can find her here, she is a free to use artist.

Supplies Needed:

Tube or image of choice
Scrapkit: "Tainted Love" by Yarrow and can be purchased here.
Font(s): P22 Ruthie

Here we go!

Open a new image, 500 x 500 (we can resize later), flood fill with white.

Open frame1 - Copy, paste as a new layer, resize to fit, I rotated mine 90 degrees.

Open paper 4 - Select inside of frame with magic wand, expand by 3, add new layer, floodfill with paper 4, select none, move underneath frame layer.

Open tube or image of choice - Copy, paste tube as new layer, make any resizing now.

Open assortment of elements - Copy, paste each as a new layer, resizing and rotating to your liking.

At this point, I usually resize if I need a smaller image. I also save both the original size and the smaller size images.

Add a new vector layer for you name, I flood filled mine with paper 8, duplicate, convert top layer to raster, change blend mode to multiply to make it darker.

Go back through to sharpen and add a drop shadow to your layers.

Add your copyright as the finishing touch.

Save your tag in your favorite format and you are done!!

This tutorial was written by Debbie (Mystic Inc Design), 2009. Any resemblance to any other tutorial is purely coincidental and not intended.
Related Posts Plugin for WordPress, Blogger...