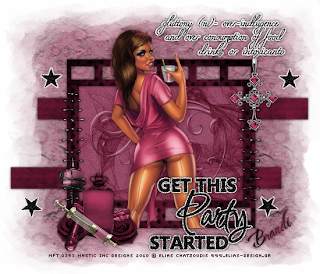
 This tutorial was written for those that have a working knowledge of PSP (I use Version 9).
Artwork by Elias Chatzoudis and he is a pay to use artist, you can currently find him here. Please make sure that you have the appropriate My PSP Tubes or PSP Tubes Emporium artist license to use the same tube as I do.
Supplies Needed:
Tube or image of choice
Scrap Kit: "Deadly Sins - Gluttony" by Grunge & Glitter and can be purchased here.
Template: Template 158 by Blissfully Beth, you can find it here.
Mask(s): Insatiable Dreams 149 and you can find it here.
Font(s): The NautiGal
Here we go!
Open template, Shift + "D" to duplicate to a new image. Close original template and go ahead and "Save As" your new template to your desired folder. Turn off copyright layer and move to bottom.
Copy and paste paper 12 as new layer, move to bottom, apply mask.
Delete both blue frames and both gray squares.
In your layer window, select Filmstrip, Select All, using magic wand, select on template, add new layer, flood fill with paper 4, deselect, delete original layer.
In your layer window, select White BG, Select All, using magic wand, select on template, add new layer, flood fill with paper 10, deselect, delete original layer.
In your layer window, select Gray Stripe 1, Select All, using magic wand, select on template, add new layer, flood fill with paper 1, deselect, delete original layer. Repeat with Gray Stripe 2. Effects, Texture Effects, Blinds, width 2, opacity 30, color black, horizontal checked.
In your layer window, select Stars, add 50% uniform, monochrome noise. Repeat with Word Art layer.
Open your tube or image of choice - Copy and paste, arrange and resize to your liking, duplicate, add gaussian blur of 5, change blend mode to multiply and lower opacity down to 56.
Copy and paste any other elements that you would like to use, resizing and rotating as you go.
At this point, I usually resize if I need a smaller image. I also save both the original size and the smaller size images.
Add a new vector layer for your text - (I floodfilled mine with paper 11.) To make it stand out, duplicate the layer, convert bottom layer to raster, expand by 2, flood fill with white.
Go back through to sharpen and add a drop shadow to your layers.
Add your copyright as the finishing touch.
Save your tag in your favorite format and you are done!!
This tutorial was written by Debbie (Mystic Inc Design), 2010. Any resemblance to any other tutorial is purely coincidental and not intended.

0 Scribbles:
Post a Comment