CLICK HERE FOR FREE BLOG LAYOUTS, LINK BUTTONS AND MORE! »

Friday, March 25, 2011

Forever Kind of Love


Artwork by Zindy SD Nielson and you can find her here. Please make sure that you have the appropriate artist license to use the same tube as I do.

Supplies Needed:

Tube or image of choice
Scrap Kit: "Crazy Kind of Love" by Created by Jill Scraps, a list of stores that sell her product are on her blog here.
Mask(s): Your choice, mine was #433 by Vix.
Font(s): AL Charisma & MA Sexy

Here we go!

Open new image, 500x500, flood fill background with white.

Copy and paste frame 4, re size as necessary, using magic wand, select inside of frame, expand by 5, flood fill with paper 01.

Copy and paste paper 01 as a new layer, move on top of paper fill for frame, apply mask.

Copy and paste any other elements that you would like to use, resizing and rotating as you go. Make sure you layer the leaves so some are underneath the frame.

Copy and paste the tube of your choice, re size to fit into frame, duplicate, mirror image for other side.

At this point, I usually re size if I need a smaller image. I also save both the original size and the smaller size images.

Add a new vector layer for your text - (I flood filled mine with black) To make it stand out, duplicate the layer, convert bottom layer to raster, expand by 2, flood fill with white.

Go back through to sharpen and add a drop shadow to your layers.

Add your copyright as the finishing touch.

Save your tag in your favorite format and you are done!!

This tutorial was written by Debbie (Mystic Inc Design), 2011. Any resemblance to any other tutorial is purely coincidental and not intended.

It's a Crazy Thing


Artwork by Zindy SD Nielson and you can find her here. Please make sure that you have the appropriate artist license to use the same tube as I do.

Supplies Needed:

Tube or image of choice
Scrap Kit: "Crazy Kind of Love" by Created by Jill Scraps, a list of stores that sell her product are on her blog here.
Mask(s): Your choice, mine was by Vix, but I don't know which one.
Font(s): AL Charisma

Here we go!

Open new image, 500x500, floodfill background with white.

Copy and paste frame 3, rotate 90ยบ, resize as necessary, using magic wand, select inside of frame, expand by 5, flood fill with paper 01.

Copy and paste any other elements that you would like to use, resizing and rotating as you go.

Copy and paste the tube of your choice, resize to fit into frame, duplicate, mirror image for other side.

At this point, I usually resize if I need a smaller image. I also save both the original size and the smaller size images.

Add a new vector layer for your text - (I floodfilled mine with black) I lowered the opacity so it would blend better.

Go back through to sharpen and add a drop shadow to your layers.

Add your copyright as the finishing touch.

Save your tag in your favorite format and you are done!!

This tutorial was written by Debbie (Mystic Inc Design), 2011. Any resemblance to any other tutorial is purely coincidental and not intended.

Saturday, March 19, 2011

Burst of Spring


Artwork by Keith Garvey and he is a pay to use artist, you can currently find him here. Please make sure that you have the appropriate My PSP Tubes or PSP Tubes Emporium artist license to use the same tube as I do.

Supplies Needed:

Tube or image of choice
Scrap Kit: "Burst of Spring" by Created by Jill Scraps, a list of stores that sell her product are on her blog here.
Font(s): Precious

Here we go!

Open new image, 500x500, floodfill background with white.

Copy and paste frame 5, resize as necessary, using magic wand, select inside of frame, expand by 5, flood fill with paper 01, add a new layer, floodfill with paper 11, move both layers underneath frame. Lower opacity of the top layer.

Copy and paste doodle 1, resize, move underneath frame layer, duplicate, move on top of frame layer.

Copy and paste any other elements that you would like to use, resizing and rotating as you go.

Copy and paste the tube of your choice, duplicate, change blend mode to overlay, lower opacity to 75, apply gaussian blur of 3.

At this point, I usually resize if I need a smaller image. I also save both the original size and the smaller size images.

Add a new vector layer for your text - (I floodfilled mine with black) To make it stand out, duplicate the layer, convert bottom layer to raster, expand by 2, flood fill with white.

Go back through to sharpen and add a drop shadow to your layers.

Add your copyright as the finishing touch.

Save your tag in your favorite format and you are done!!

This tutorial was written by Debbie (Mystic Inc Design), 2011. Any resemblance to any other tutorial is purely coincidental and not intended.

Saturday, December 4, 2010

Amour


Artwork by Anna Marine and she is a pay to use artist, you can currently find her here at Creative Design Outlet. Please make sure that you have the appropriate CILM or Creative Design Outlet artist license to use the same tube as I do.

Supplies Needed:

Tube or image of choice
Scrap Kit: "Amour" by Addictive Pleasures and can be purchased here.
Plug In(s): Alien Skin Xenofex 2 - Constellation
Font(s): Snagglepuss

Here we go!

Open new image, 500x500, flood fill background with white.

Copy and paste ele58, resize as necessary. Add a new vector layer, rectangle and draw out to be just a little bigger than inside of frame, flood filling with paper 7, convert to raster layer. Using Constellation plug in, from top to bottom: 2, 50, 50, 4, 30, 100, 45, keep original image.

Copy and paste ele34, resize, duplicate, mirror.

Copy and paste ele61, resize, duplicate, mirror.

Copy and paste any other elements that you would like to use, resizing and rotating as you go.

Copy and paste the tube of your choice, duplicate, change blend mode to multiply, lower opacity to 70, add a gaussian blur of 5.

At this point, I usually resize if I need a smaller image. I also save both the original size and the smaller size images.

Add a new vector layer for your text - (I floodfilled mine with black) To make it stand out, duplicate the layer, convert bottom layer to raster, expand by 2, flood fill with white.

Go back through to sharpen and add a drop shadow to your layers.

Add your copyright as the finishing touch.

Save your tag in your favorite format and you are done!!

This tutorial was written by Debbie (Mystic Inc Design), 2010. Any resemblance to any other tutorial is purely coincidental and not intended.

For Lost Loves


Artwork by Anna Marine and she is a pay to use artist, you can currently find her here at Creative Design Outlet. Please make sure that you have the appropriate CILM or Creative Design Outlet artist license to use the same tube as I do.

Supplies Needed:

Tube or image of choice
Scrap Kit: "Is it Love" by Addictive Pleasures and can be purchased here.
Font(s): Good Vibrations ROB

Here we go!

Open new image, 500x500, floodfill background with white.

Copy and paste frame 2, resize as necessary.

Copy and paste rose swag, resize.

Copy and paste vine, resize, duplicate, change blend mode to multiply, rote both layers to 90 degrees and move to bottom of frame.

Copy and paste flowers 2, resize, arrange on top of vines, colorize to a shade of red to your liking, duplicate and change blend mode to multiply, rotate both layers 90 degrees, move over vines across bottom.

Copya and paste clock, resize to just fit into flower layers, move on top of frame layer.

Copy and paste any other elements that you would like to use, resizing and rotating as you go.

Copy and paste the tube of your choice, duplicate, change blend mode to multiply, lower opacity to 48, add a gaussian blur of 5.

At this point, I usually resize if I need a smaller image. I also save both the original size and the smaller size images.

Add a new vector layer for your text - (I floodfilled mine with paper 16) To make it stand out, duplicate the layer, convert bottom layer to raster, expand by 2, floodfill with white.

Go back through to sharpen and add a drop shadow to your layers.

Add your copyright as the finishing touch.

Save your tag in your favorite format and you are done!!

This tutorial was written by Debbie (Mystic Inc Design), 2010. Any resemblance to any other tutorial is purely coincidental and not intended.

The Bride and Groom


Artwork by Zindy SD Nielson and you can find her here. Please make sure that you have the appropriate artist license to use the same tube as I do.

Supplies Needed:

Tube or image of choice
Scrap Kit: "A Twilight Wedding 2" by Addictive Pleasures and can be purchased here.
Font(s): Sarah Script

Here we go!

Open new image, 500x500, flood fill background with white.

Copy and paste frame 2, rotate 90 degrees right, resize as necessary, using magic wand, select inside of frame, flood fill with paper 12, move layer underneath frame.

Copy and paste curtain 3, resize, move underneath frame layer, duplicate, mirror.

Copy and paste lights, resize, duplicate, mirror, erase middle light on both layers.

Copy and paste any other elements that you would like to use, resizing and rotating as you go.

Copy and paste the tube of your choice, duplicate, change blend mode to multiply, lower opacity to 58, add a gaussian blur of 5.

At this point, I usually resize if I need a smaller image. I also save both the original size and the smaller size images.

Add a new vector layer for your text - (I flood filled mine with black) To make it stand out, duplicate the layer, convert bottom layer to raster, expand by 2, floodfill with white.

Go back through to sharpen and add a drop shadow to your layers.

Add your copyright as the finishing touch.

Save your tag in your favorite format and you are done!!

This tutorial was written by Debbie (Mystic Inc Design), 2010. Any resemblance to any other tutorial is purely coincidental and not intended.

1776


Artwork by Keith Garvey and he is a pay to use artist, you can currently find him here. Please make sure that you have the appropriate My PSP Tubes or PSP Tubes Emporium artist license to use the same tube as I do.

Supplies Needed:

Tube or image of choice
Scrap Kit: "Revalution" by Addictive Pleasures and can be purchased here.
Font(s): The King and Queen

Here we go!

Open new image, 500x500, flood fill background with white.

Copy and paste frame 3, resize as necessary, using magic wand, select inside of frame, flood fill with paper 12, move layer underneath frame.

Copy and paste flags, resize, move underneath frame layer, multiply.

Copy and paste any other elements that you would like to use, resizing and rotating as you go.

Copy and paste the tube of your choice, duplicate, change blend mode to multiply, lower opacity to 44.

At this point, I usually resize if I need a smaller image. I also save both the original size and the smaller size images.

Add a new vector layer for your text - (I flood filled mine with paper 7) To make it stand out, duplicate the layer, convert bottom layer to raster, drop shadow in black, effects, texture effects, blinds with the settings 2, 30, horizontal, flood fill with black.

Go back through to sharpen and add a drop shadow to your layers.

Add your copyright as the finishing touch.

Save your tag in your favorite format and you are done!!

This tutorial was written by Debbie (Mystic Inc Design), 2010. Any resemblance to any other tutorial is purely coincidental and not intended.
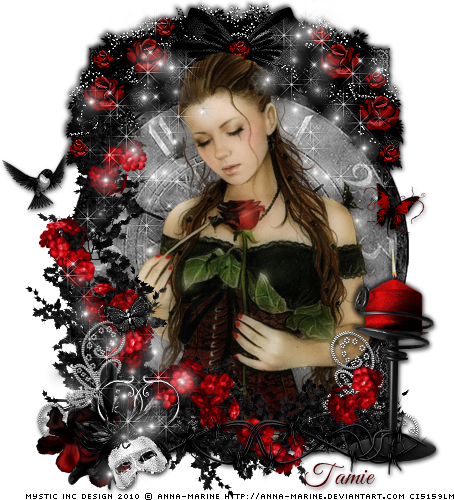
Deadly Sins - Sloth


Artwork by Susan Heidi and she is a pay to use artist, you can find her here. Please make sure that you have the appropriate My PSP Tubes artist license to use the same tube as I do.

Supplies Needed:

Tube or image of choice
Scrap Kit: "Deadly Sins - Sloth" by Grunge & Glitter and can be purchased here.
Mask(s): Insatiable Dreams 137, you can find it here.
Font(s): Alex Brush

Here we go!

Open new image, 500x500, floodfill background with white.

Copy and paste papers 2 as new layer, move to bottom, apply mask, you may want to duplicate.

Copy and paste frame 4, resize as necessary, rotate 12 degrees to the left. Using magic wand, select inside of bottom frame, flood fill with paper 2.

Copy and paste clock, lower opacity down to 22.

Copy and paste element 1, resize, paste over frame 1.

Copy and paste any other elements that you would like to use, resizing and rotating as you go.

Copy and paste the tube of your choice. You may have to use the color settings to change the tone of your tube, say either to change to sepia or gray scale. Duplicate, change blend mode to multiply.

At this point, I usually resize if I need a smaller image. I also save both the original size and the smaller size images.

Add a new vector layer for your text - (I floodfilled mine with black) To make it stand out, duplicate the layer, convert bottom layer to raster, expand by 2, flood fill with white.

Go back through to sharpen and add a drop shadow to your layers.

Add your copyright as the finishing touch.

Save your tag in your favorite format and you are done!!

This tutorial was written by Debbie (Mystic Inc Design), 2010. Any resemblance to any other tutorial is purely coincidental and not intended.

Deadly Sins - Pride


Artwork by Keith Garvey and he is a pay to use artist, you can currently find him here. Please make sure that you have the appropriate My PSP Tubes or PSP Tubes Emporium artist license to use the same tube as I do.

Supplies Needed:

Tube or image of choice
Scrap Kit: "Deadly Sins - Pride" by Grunge & Glitter and can be purchased here.
Mask(s): Insatiable Dreams 157, you can find it here.
Font(s): Ambiance BT Swash

Here we go!

Open new image, 500x500, floodfill background with white.

Copy and paste papers 11 & 7 as new layers, move to bottom, apply masks, lower opacity on 7 to 58.

Copy and paste frame 1, resize as necessary. Copy and paste the tube of your choice, this particular tube I only erased around the waist. Duplicate, change blend mode to multiply, add gaussian blur of 5, lower the opacity of the tube to 86.

Copy and paste element 1, resize, paste over frame 1.

Copy and paste any other elements that you would like to use, resizing and rotating as you go.

At this point, I usually resize if I need a smaller image. I also save both the original size and the smaller size images.

Add a new vector layer for your text - (I floodfilled mine with paper 11) To make it stand out, duplicate the layer, convert bottom layer to raster, expand by 2, flood fill with white.

Go back through to sharpen and add a drop shadow to your layers.

Add your copyright as the finishing touch.

Save your tag in your favorite format and you are done!!

This tutorial was written by Debbie (Mystic Inc Design), 2010. Any resemblance to any other tutorial is purely coincidental and not intended.

Friday, December 3, 2010

Deadly Sins - Greed

Artwork by Zindy SD Nielson and you can find her here. Please make sure that you have the appropriate artist license to use the same tube as I do.

Supplies Needed:

Tube or image of choice
Scrap Kit: "Deadly Sins - Greed" by Grunge & Glitter and can be purchased here.
Mask(s): Insatiable Dreams 228 & 256, you can find them both here.
Font(s): Bilbo

Here we go!

Open new image, 500x500, floodfill background with white.

Copy and paste papers 9 & 7 as new layers, move to bottom, apply masks.

Copy and paste barbed heart, resize as necessary. Using magic wand, select inside of heart, expand by 10, add new layer, paste paper 11. Copy and paste the tube of your choice, making sure to erase all parts outside of heart. Move layers into proper order. You may want to lower the opacity of the tube, I did down to 58.

Copy and paste mesh, resize, paste under paper 11.

Copy and paste any other elements that you would like to use, resizing and rotating as you go.

At this point, I usually resize if I need a smaller image. I also save both the original size and the smaller size images.

Add a new vector layer for your text - (I floodfilled mine with paper 9) To make it stand out, duplicate the layer, convert bottom layer to raster, expand by 2, flood fill with white.

Go back through to sharpen and add a drop shadow to your layers.

Add your copyright as the finishing touch.

Save your tag in your favorite format and you are done!!

This tutorial was written by Debbie (Mystic Inc Design), 2010. Any resemblance to any other tutorial is purely coincidental and not intended.

Deadly Sins - Wrath


Artwork by Zindy SD Nielson and you can find her here. Please make sure that you have the appropriate artist license to use the same tube as I do.

Supplies Needed:

Tube or image of choice
Scrap Kit: "Deadly Sins - Wrath" by Grunge & Glitter and can be purchased here.
Mask(s): Insatiable Dreams 164, you can find it here.
Font(s): A&S Songwriter

Here we go!

Open new image, 500x500, floodfill background with white.

Copy and paste frame 2.

Copy and paste paper 8 as new layer, move to bottom, apply mask, move towards top, merge group, duplicate, move towards bottom.

Copy and paste the tube of your choice, making sure to erase all parts outside of frame, colorize with settings Hue 29 & Saturation 92.

Copy and paste any other elements that you would like to use, resizing and rotating as you go.

At this point, I usually resize if I need a smaller image. I also save both the original size and the smaller size images.

Add a new vector layer for your text - (I floodfilled mine with paper 2) To make it stand out, duplicate the layer, convert bottom layer to raster, expand by 2, flood fill with white.

Go back through to sharpen and add a drop shadow to your layers.

Add your copyright as the finishing touch.

Save your tag in your favorite format and you are done!!

This tutorial was written by Debbie (Mystic Inc Design), 2010. Any resemblance to any other tutorial is purely coincidental and not intended.

Monday, November 29, 2010

Deadly Sins - Lust


This tutorial was written for those that have a working knowledge of PSP (I use Version 9).

Artwork by Keith Garvey and he is a pay to use artist, you can currently find him here. Please make sure that you have the appropriate My PSP Tubes or PSP Tubes Emporium artist license to use the same tube as I do.

Supplies Needed:

Tube or image of choice
Scrap Kit: "Deadly Sins - Lust" by Grunge and Glitter and can be found here.
Font(s): The NautiGal

Here we go!

Open new image, 500x500, flood fill background with white.

Open frame 4 and paper cardboard - copy and paste frame as a new layer, resize. Copy and paste cardboard as a new layer, resizing to smaller than frame. Move fill layer underneath frame.

Open your tube or image of choice - copy and paste, arrange and resize to your liking, duplicate, change blend mode to multiply, add gaussian blur of 5, and lower opacity to 64. Only drop shadow bottom layer.

Open your choice of extra goodies - copy and paste as new layers, resizing as you go.

At this point, I usually resize if I need a smaller image. I also save both the original size and the smaller size images.

Add a new vector layer for your name, flood fill with white.

Go back through to sharpen and add a drop shadow to your layers.

Add your copyright as the finishing touch.

Save your tag in your favorite format and you are done!!

This tutorial was written by Debbie (Mystic Inc Design), 2010. Any resemblance to any other tutorial is purely coincidental and not intended.

Deadly Sins - Gluttony

This tutorial was written for those that have a working knowledge of PSP (I use Version 9).

Artwork by Elias Chatzoudis and he is a pay to use artist, you can currently find him here. Please make sure that you have the appropriate My PSP Tubes or PSP Tubes Emporium artist license to use the same tube as I do.

Supplies Needed:

Tube or image of choice
Scrap Kit: "Deadly Sins - Gluttony" by Grunge & Glitter and can be purchased here.
Template: Template 158 by Blissfully Beth, you can find it here.
Mask(s): Insatiable Dreams 149 and you can find it here.
Font(s): The NautiGal

Here we go!

Open template, Shift + "D" to duplicate to a new image. Close original template and go ahead and "Save As" your new template to your desired folder. Turn off copyright layer and move to bottom.

Copy and paste paper 12 as new layer, move to bottom, apply mask.

Delete both blue frames and both gray squares.

In your layer window, select Filmstrip, Select All, using magic wand, select on template, add new layer, flood fill with paper 4, deselect, delete original layer.

In your layer window, select White BG, Select All, using magic wand, select on template, add new layer, flood fill with paper 10, deselect, delete original layer.

In your layer window, select Gray Stripe 1, Select All, using magic wand, select on template, add new layer, flood fill with paper 1, deselect, delete original layer. Repeat with Gray Stripe 2. Effects, Texture Effects, Blinds, width 2, opacity 30, color black, horizontal checked.

In your layer window, select Stars, add 50% uniform, monochrome noise. Repeat with Word Art layer.

Open your tube or image of choice - Copy and paste, arrange and resize to your liking, duplicate, add gaussian blur of 5, change blend mode to multiply and lower opacity down to 56.

Copy and paste any other elements that you would like to use, resizing and rotating as you go.

At this point, I usually resize if I need a smaller image. I also save both the original size and the smaller size images.

Add a new vector layer for your text - (I floodfilled mine with paper 11.) To make it stand out, duplicate the layer, convert bottom layer to raster, expand by 2, flood fill with white.

Go back through to sharpen and add a drop shadow to your layers.

Add your copyright as the finishing touch.

Save your tag in your favorite format and you are done!!

This tutorial was written by Debbie (Mystic Inc Design), 2010. Any resemblance to any other tutorial is purely coincidental and not intended.

Deadly Sins - Envy


This tutorial was written for those that have a working knowledge of PSP (I use Version 9).

Artwork by Camilla Drakenborg and she is a pay to use artist, you can currently find her here at CILM. Just a side note, they will be closing on December 31, 2010. Please make sure that you have the appropriate CILM artist license to use the same tube as I do.

Supplies Needed:

Tube or image of choice
Scrap Kit: "Deadly Sins - Envy" by Grunge & Glitter and can be purchased here.
Template: Christmas Template (2009) by Kelly, you can find it here on the Misfits blog.
Mask(s): Insatiable Dreams 119 and you can find it here.
Filter(s): MuRa Meister's Copies
Font(s): Rockwell Condensed

Here we go!

Open template, Shift + "D" to duplicate to a new image. Close original template and go ahead and "Save As" your new template to your desired folder. Turn off copyright layer and move to bottom.

Copy and paste paper 3 as new layer, move to bottom, apply mask.

Delete Snowflake 1 & 2, BkgText, SMRectBlinds, and LgRectText.

In your layer window, select LgRect, Select All, using magic wand, select on template, add new layer, flood fill with paper 8, deselect, delete original layer.

To make the text layer, create a new transparent image, 500 x 500, add new vector layer, choose a font that is easy to read and very plain, something typewriterish works great, convert to raster layer. Go to Effects, MuRa's Meister Copies, change tile mode to tile, on the right hand side numbers are as follows, right down the line: 1 50 50 0 0 0 100 0 100 1 0 30 0. These may change depending on your font choice. Copy text layer, select the LgRect that you just filled, paste as new layer, invert, in layers window, delete the text layer to leave only what's inside the box.

In your layer window, select SMRectWhite, Select All, using magic wand, select on template, add new layer, flood fill with paper 3, deselect, delete original layer.

In your layer window, select LgRectGlow, Select All, using magic wand, select on template, add new layer, flood fill with paper 1, deselect, delete original layer.

In your layer window, select MedRectFill, Select All, using magic wand, select on template, add new layer, flood fill with paper 3, deselect, delete original layer.

In your layer window, select MedRectBlinds, Select All, using magic wand, select on template, add new layer, flood fill with paper 11, deselect, delete original layer.

In your layer window, select CircleFill, Select All, using magic wand, select on template, add new layer, flood fill with paper 2, deselect, delete original layer.

In your layer window, select LfRectBorder, Select All, using magic wand, select on template, add new layer, flood fill with paper 9, add 50% uniform, monochrome noise, deselect, delete original layer. Repeat same process with CricleOutline and MedRectBorder.

In your layer window, select square frames, Select All, using magic wand, select small circle, add new layer, flood fill with paper 8, deselect, delete original layer,apply noise 50%, uniform & monochrome selected.

Open your tube or image of choice - Copy and paste, arrange and resize to your liking, duplicate, add gaussian blur of 5, change blend mode to multiply and lower opacity down to 28.

Copy and paste any other elements that you would like to use, resizing and rotating as you go.

At this point, I usually resize if I need a smaller image. I also save both the original size and the smaller size images.

Add a new vector layer for your text - (I floodfilled mine with paper 4.) To make it stand out, duplicate the layer, convert bottom layer to raster, expand by 2, flood fill with white.

Go back through to sharpen and add a drop shadow to your layers.

Add your copyright as the finishing touch.

Save your tag in your favorite format and you are done!!

This tutorial was written by Debbie (Mystic Inc Design), 2010. Any resemblance to any other tutorial is purely coincidental and not intended.

Tuesday, November 16, 2010

Give Thanks


This tutorial was written for those that have a working knowledge of PSP (I use Version 9).

Artwork by Anna Marine and she is a pay to use artist, you can currently find her here at Creative Design Outlet. Please make sure that you have the appropriate CILM or Creative Design Outlet artist license to use the same tube as I do.

Please make sure that you have the appropriate CILM artist license to use the same tube as I do.

Supplies Needed:

Tube or image of choice
Scrap Kit: "Autumn Falls" by Creationz by Jo and can be purchased here.
Mask(s): Vix 265 and can be found here.
Font(s): AL Charisma

Here we go!

Open new image, 500x500, floodfill background with white.

Open stick frame, copy and paste as a new layer, rotate 180 degrees, resize to your liking. Using magic wand, select inside of frame, expand by 2, add new raster layer, copy and paste paper 16, move underneath frame layer.

Copy and paste paper 16 as new bottom layer, apply mask, you may need to resize.

Open your tube or image of choice - Copy and paste, you may need to resize, duplicate and move one layer on top of frame, erase all hanging over parts except for hair.

Copy and paste all of the elements that you want to use. You'll have to resize and rotate, and it would be easier if you sharpened and drop shadowed layers as you went.

At this point, I usually resize if I need a smaller image. I also save both the original size and the smaller size images.

Add a new vector layer for your text,flood fill with paper 16, convert to raster layer. To make it stand out, use could use either Eye Candy Gradient Glow or duplicate the layer, convert bottom layer to raster, select all, use magic wand to select text, expand by 2, floodfill with colour of choice.

Go back through to sharpen and add a drop shadow to your layers.

Add your copyright as the finishing touch.

Save your tag in your favorite format and you are done!!

This tutorial was written by Debbie (Mystic Inc Design), 2010. Any resemblance to any other tutorial is purely coincidental and not intended.

Winter Diva


This tutorial was written for those that have a working knowledge of PSP (I use
Version 9).

Artwork by Keith Garvey and he is a pay to use artist, you can currently find him here. Please make sure that you have the appropriate My PSP Tubes or PSP Tubes Emporium artist license to use the same tube as I do.

Supplies Needed:

Tube or image of choice
Scrap Kit: "Winter Chill" by Creationz by Jo and can be purchased here.
Mask(s): Vix Christmas 6 and can be found here.
Font(s): Passions Conflict ROB

Here we go!

Open new image, 500x500, floodfill background with white.

Open wreath, copy and paste as a new layer, resize to your liking. Using magic wand, select inside of frame, expand by 6, add new raster layer, copy and paste paper 11, move underneath frame layer.

Copy and paste paper 3 as new bottom layer, apply mask, you may need to resize.

Open your tube or image of choice - Copy and paste, you may need to resize, duplicate and move one layer on top of frame, erase all hanging over parts.

Copy and paste all of the elements that you want to use. You'll have to resize and rotate. I added more branches underneath frame, the reindeer, & gem stars.

At this point, I usually resize if I need a smaller image. I also save both the original size and the smaller size images.

Add a new vector layer for your text,flood fill with paper 3 as background fill and white as foreground fill, convert to raster layer. To make it stand out, use could use either Eye Candy Gradient Glow or duplicate the layer, convert bottom layer to raster, select all, use magic wand to select text, expand by 2, floodfill with colour of choice.

Go back through to sharpen and add a drop shadow to your layers.

Add your copyright as the finishing touch.

Save your tag in your favorite format and you are done!!

This tutorial was written by Debbie (Mystic Inc Design), 2010. Any resemblance to any other tutorial is purely coincidental and not intended.

Sunday, November 14, 2010

Girly Girl


This tutorial was written for those that have a working knowledge of PSP (I use
Version 9).

Artwork by Keith Garvey and he is a pay to use artist, you can currently find him here. Please make sure that you have the appropriate My PSP Tubes or PSP Tubes Emporium artist license to use the same tube as I do.

Supplies Needed:

Tube or image of choice
Scrap Kit: "IDK :]" by Grunge and Glitter and can be found here.
Mask(s): Weescotslass 128, and you can find that here.
Font(s): Problem Secretary

Here we go!

Open new image, 500x500, floodfill background with white.

Open heart frame and paper 1 - copy and paste frame as a new layer, resize. Use magic wand and select inside of frame, copy and paste paper 1 as a new layer. Move fill layer underneath frame.

Copy and paste paper 5, apply mask, duplicate, move one up and move one down, move underneath all layers.

Open your tube or image of choice - copy and paste, arrange and resize to your liking, duplicate, move this layer on top of frame, erase any parts on the bottom that hang over.

Only dropshadow bottom layer.

Open your choice of extra goodies - copy and paste as new layers, resizing as you go.

At this point, I usually resize if I need a smaller image. I also save both the original size and the smaller size images.

Add a new vector layer for your name, floodfill with paper 4, convert to raster layer. To make it stand out, use could use either Eye Candy Gradient Glow or duplicate the layer, convert bottom layer to raster, select all, use magic wand to select text, expand by 2, floodfill with white.

Go back through to sharpen and add a drop shadow to your layers.

Add your copyright as the finishing touch.

Save your tag in your favorite format and you are done!!

This tutorial was written by Debbie (Mystic Inc Design), 2010. Any resemblance to any other tutorial is purely coincidental and not intended.

Conjure Me


This tutorial was written for those that have a working knowledge of PSP (I use
Version 9).

Artwork by Anna Marine and she is a pay to use artist, you can currently find her here at Creative Design Outlet. Please make sure that you have the appropriate CILM or Creative Design Outlet artist license to use the same tube as I do.

Supplies Needed:

Tube or image of choice
Scrap Kit: "Living Dead Girl" by Grunge and Glitter and can be found here.
Mask(s): Weescotslass 128, and you can find that here.
Font(s): A&S Wizard

Here we go!

Open new image, 500x500, floodfill background with white.

Open frame 4, wire, and paper 2 - copy and paste frame as a new layer, resize. Use magic wand and select inside of frame, copy and paste paper 2 as a new layer, copy and paste wire as a new layer. Move all layers underneath frame.

Copy and paste paper 5, apply mask, move underneath all layers.

Open your tube or image of choice - copy and paste, arrange and resize to your liking, duplicate, change blend mode of top layer to multiply, lower opacity to 72, add gaussian blur of 5. Only dropshadow bottom layer.

Open your choice of extra goodies - copy and paste as new layers, resizing as you go. Don't forget the gargoyle!!

At this point, I usually resize if I need a smaller image. I also save both the original size and the smaller size images.

Add a new vector layer for your name, floodfill with paper 5, convert to raster layer. To make it stand out, use could use either Eye Candy Gradient Glow or duplicate the layer, convert bottom layer to raster, select all, use magic wand to select text, expand by 2, floodfill with black, drop shadow with white.

Go back through to sharpen and add a drop shadow to your layers.

Add your copyright as the finishing touch.

Save your tag in your favorite format and you are done!!

This tutorial was written by Debbie (Mystic Inc Design), 2010. Any resemblance to any other tutorial is purely coincidental and not intended.

Secrets in the Snow


This tutorial was written for those that have a working knowledge of PSP (I use
Version 9).

Artwork by Unholy Vault Designs and she is a pay to use artist that you can find here. Please make sure that you have the appropriate My PSP Tubes artist license to use the same tube as I do.

Supplies Needed:

Tube or image of choice
Scrap Kit: "Silent Night" by Grunge and Glitter and can be found here.
Plugin(s): Alien Skin Xenofex Constellation (optional)
Font(s): Pristina

Here we go!

Open new image, 500x500, floodfill background with white.

Open frame 3, copy and paste as a new layer, rotate 90 degrees, resize to your liking, erase the ribbon. Using magic wand, select inside of frame, expand by 2, add new raster layer, copy and paste paper 15, move underneath frame layer. For snow, use Xenofex, 2, 100, 9, 8, 8, 99, rotation 45, keep original image. Duplicate frame layer and change the blend mode on the top layer to modify.

Open tree, copy and paste as a new layer, resize to your liking, repeat two additional times.

Open moon, copy and paste as a new layer, resize to your liking.

Open clock, copy and paste as a new layer, right under the trees, lower opacity.

Open your tube or image of choice - Copy and paste, you may need to resize.

At this point, I usually resize if I need a smaller image. I also save both the original size and the smaller size images.

Add a new vector layer for your text,convert to raster layer. To make it stand out, use could use either Eye Candy Gradient Glow or duplicate the layer, convert bottom layer to raster, select all, use magic wand to select text, expand by 2, floodfill with colour of choice.

Go back through to sharpen and add a drop shadow to your layers.

Add your copyright as the finishing touch.

Save your tag in your favorite format and you are done!!

This tutorial was written by Debbie (Mystic Inc Design), 2010. Any resemblance
to any other tutorial is purely coincidental and not intended.

Madame Midnight


This tutorial was written for those that have a working knowledge of PSP (I use
Version 9).

Artwork by Grant Turner and he is a pay to use artist, you can find him here. Please make sure that you have the appropriate My PSP Tubes artist license to use the same tube as I do.

Supplies Needed:

Tube or image of choice
Scrap Kit: "Madame Midnight" by Grunge and Glitter and can be found here.
Mask(s): Weescotslass 128, and you can find that here.
Font(s): Satisfaction

Here we go!

Open new image, 500x500, floodfill background with white.

Open frame 1 and papers 1, 2, and 6 - copy and paste frame as a new layer, resize. Use magic wand and select inside of frame, add new layer, floodfill with paper 1, repeat with papers 2 and 6. Change papers 2 and 6 blend mode to overlay, move underneath frame in the order that you added them.

Copy and paste paper 18, apply mask, move underneath all layers, resize, duplicate, select all, floodfill top layer with paper 17.

Open your tube or image of choice - copy and paste, arrange and resize to your liking, duplicate, change top layer blend mode to 70, lower opacity down to 70, add gaussian blur 5. Dropshadow only bottom layer

Open your choice of extra goodies - copy and paste as new layers, resizing as you go.

At this point, I usually resize if I need a smaller image. I also save both the original size and the smaller size images.

Add a new vector layer for your name, background with #800000 foreground null, convert to raster layer. To make it stand out, use could use either Eye Candy Gradient Glow or duplicate the layer, convert bottom layer to raster, select all, use magic wand to select text, expand by 2, floodfill with black, drop shadow with white.

Go back through to sharpen and add a drop shadow to your layers.

Add your copyright as the finishing touch.

Save your tag in your favorite format and you are done!!

This tutorial was written by Debbie (Mystic Inc Design), 2010. Any resemblance
to any other tutorial is purely coincidental and not intended.
Related Posts Plugin for WordPress, Blogger...