CLICK HERE FOR FREE BLOG LAYOUTS, LINK BUTTONS AND MORE! »

Saturday, January 23, 2010

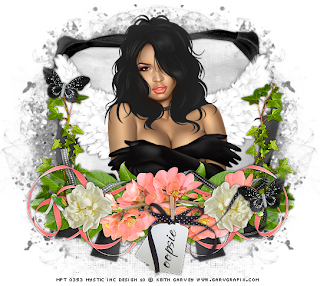
My Angel


This tutorial was written for those that have a working knowledge of PSP (I use
Version 9).

Artwork by Keith Garvey and he is a pay to use artist, you can currently find him here. Please make sure that you have the appropriate My PSP Tubes or PSP Tubes Emporium artist license to use the same tube as I do.

Supplies Needed:

Tube or image of choice
Scrap Kit: "Wing & A Prayer" by Oopsie Daisy and can be purchased here.
Mask(s): #400 by Vix, which you can find here.
Font(s): Ephesis

Here we go!

Open a new image, 550 x 500 (we can resize later), flood fill with white.

Open element 79 - Copy, paste as a new layer, resize to fit, duplicate, mirror, erase all of second frame except ribbon at the bottom.

Open paper 4 - Copy, paste as a new layer, resize to fit right under frame opening, move down to bottom layer.

Open tube or image of choice - Copy, paste tube as new layer, make any resizing now, duplicate, move top copy over frame, erasing any parts that are hanging over on each layer.

Open assortment of elements - Copy, paste each as a new layer, resizing and rotating to your liking. Try to "layer" all the greenery to give more depth.

At this point, I usually resize if I need a smaller image. I also save both the original size and the smaller size images.

Add a new vector layer for you name, I flood filled mine with black.

Go back through to sharpen and add a drop shadow to your layers.

Add your copyright as the finishing touch.

Save your tag in your favorite format and you are done!!

This tutorial was written by Debbie (Mystic Inc Design), 2010. Any resemblance to any other tutorial is purely coincidental and not intended.
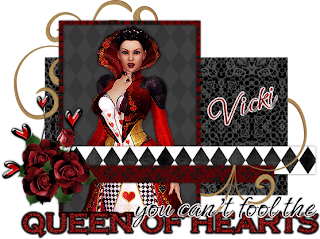
Queen of Hearts


This tutorial was written for those that have a working knowledge of PSP (I use Version 9).

Artwork was provided with the kit.

Supplies Needed:

Tube or image of choice
Scrap Kit: "Queen of Hearts" by Gemini Creationz and can be purchased here.
Template: Sara's Scraps #28, you can find it here.
Font(s): Ephesis & Copperplate Graphic

Here we go!

NOTE: All papers have been resized, please keep that in mind when you are using the flood fill tool.

Open template 1, Shift + "D" to duplicate to a new image. Close original template and go ahead and "Save As" your new template to your desired folder. Turn off copyright layer and move to bottom.

In your layer window, select rectangle 1, Select All, using magic wand, select rectangle 1, add new layer, flood fill with black, add new layer (keep selected), flood fill with
paper 9, deselect, delete original layer, change opacity to paper 9 layer to 38.

In your layer window, select frame background, Select All, using magic wand, select frame background, add new layer, flood fill with paper 1, deselect, change blend mode to
paper 1 to multiply and lower opacity to 18.

In your layer window, select frame, Select All, using magic wand, select frame, add new layer, flood fill with paper 8, deselect, delete original layer.

In your layer rectangle 2, select frame, Select All, using magic wand, select rectangle 2, add new layer, flood fill with paper 1, deselect, delete original layer.

In your layer window, select rectangle 3, Select All, using magic wand, select rectangle 3, add new layer, flood fill with paper 8, deselect, delete original layer.

Open your tube or image of choice - Copy and paste on top of frame background layer, duplicate, change blend mode to multiply and lower opacity to 52.

Copy and paste any other elements that you would like to use, resizing and rotating as you go.

At this point, I usually resize if I need a smaller image. I also save both the original size and the smaller size images.

Add a new vector layer for your text - (I floodfilled mine with paper 10 and applied noise uniform 50% monochrome checked) To make it stand out, use could use either Eye Candy or duplicate the layer, convert bottom layer to raster, select all, use magic wand to select text, expand by 2, floodfill with black.

Add a new vector layer for your second text - (I floodfilled mine with black) To make it stand out, use could use either Eye Candy or duplicate the layer, convert bottom layer to
raster, select all, use magic wand to select text, expand by 2, floodfill with white, apply noise uniform 50% monochrome checked.

Add a new vector layer for your name - (I floodfilled mine with paper 10) To make it stand out, use could use either Eye Candy or duplicate the layer, convert bottom layer to
raster, select all, use magic wand to select text, expand by 2, floodfill with white, apply noise uniform 50% monochrome checked.

Go back through to sharpen and add a drop shadow to your layers.

Add your copyright as the finishing touch.

Save your tag in your favorite format and you are done!!

This tutorial was written by Debbie (Mystic Inc Design), 2010. Any resemblance to any other tutorial is purely coincidental and not intended.

Saturday, January 16, 2010

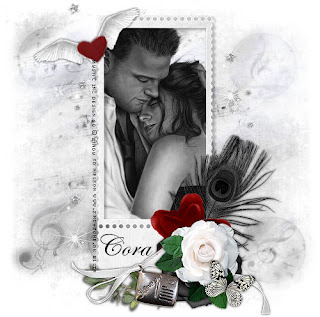
In Your Arms Again


This tutorial was written for those that have a working knowledge of PSP (I use Version 9).

Image courtesy of Zindy SD Nielson, it is a pay to use tube and can be purchased here. Please make sure that you have the appropriate artist license to use the same tube as I do.

Supplies Needed:

Tube or image of choice
Scrap Kit: "My Immortal" by Cora's Creations and can be purchased here.
Mask(s): ButterflyFlutterby Creations 87, which can be found here.
Font(s): Edwardian Script

Here we go!

Open a new image, 500x500 (we can resize later).

Open frame 01 and paper 01 - Copy, paste as a new layer, resize to your liking. Use magic wand and select inside frame, modify by 8, flood fill with paper 01. You may need to adjust it a little over to the left.

Open image or tube of choice - Copy, paste as a new layer, resize to fit just inside frame (I adjusted hue and saturation to both 0), move to bottom layer.

Open paper 01 - Resize to 87%, copy, paste as a new layer, move to bottom, apply mask, duplicate, change opacity to multiply.

Open assortment of elements - Copy, paste each as a new layer, resizing and rotating to your liking.

At this point, I usually resize if I need a smaller image. I also save both the original size and the smaller size images.

Add a new vector layer for your name - Floodfill with black.

Go back through to sharpen and add a drop shadow to your layers.

Add your copyright as the finishing touch.

Save your tag in your favorite format and you are done!!

This tutorial was written by Debbie (Mystic Inc Design), 2010. Any resemblance to any other tutorial is purely coincidental and not intended.
Related Posts Plugin for WordPress, Blogger...