CLICK HERE FOR FREE BLOG LAYOUTS, LINK BUTTONS AND MORE! »

Tuesday, December 22, 2009

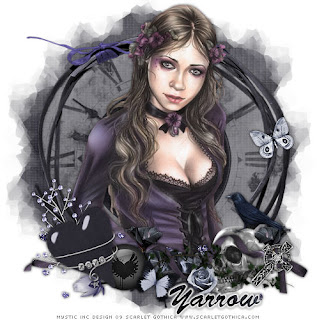
Time Keeps All Lost Souls


This tutorial was written for those that have a working knowledge of PSP (I use Version 9).

Artwork by Scarlet Gothica and you can find her here, she is a free to use artist.

Supplies Needed:

Tube or image of choice
Scrapkit: "Funeral of Love" by Yarrow & Chaos Priestess and can be purchased here.
Mask(s): WSL220 by Weescotslass and you can find it here.
Font(s): Brush Script Std

Here we go!

Open a new image, 500 x 500 (we can resize later), flood fill with white.

Open frame 04Y - Copy, paste as a new layer, resize to fit.

Open paper 09Y - Copy, paste as a new layer, apply WSL220 mask, merge down, duplicate, flip, arrange both layers to completely surround frame.

Open Clock - Copy, paste as a new layer, move underneath frame layer and resize to just fit within frame, lower opacity to 40.

Open tube or image of choice - Copy, paste tube as new layer, make any resizing now. I duplicated my tube so I have one under the frame and one on top and erased anything that hung over the frame.

Open assortment of elements - Copy, paste each as a new layer, resizing and rotating to your liking.

At this point, I usually resize if I need a smaller image. I also save both the original size and the smaller size images.

Add a new vector layer for you name, I flood filled mine with paper 10Y. To make it stand out, use could use either Eye Candy or duplicate the layer, convert bottom layer to raster, select all, use magic wand to select text, expand by 2, floodfill with white.

Go back through to sharpen and add a drop shadow to your layers.

Add your copyright as the finishing touch.

Save your tag in your favorite format and you are done!!

This tutorial was written by Debbie (Mystic Inc Design), 2009. Any resemblance to any other tutorial is purely coincidental and not intended.
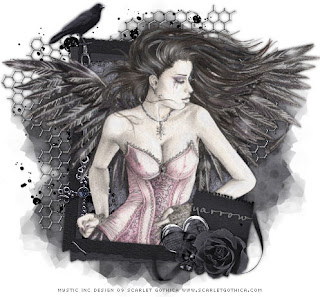
Fallen Angel


This tutorial was written for those that have a working knowledge of PSP (I use Version 9).

Artwork by Scarlet Gothica and you can find her here, she is a free to use artist.

Supplies Needed:

Tube or image of choice
Scrap Kit: "Black No.1" by Yarrow and can be purchased here.
Mask(s): WSL220 by Weescotslass and you can find it here.
Font(s): Petra Script EF - Regular

Here we go!

Open a new image, 500 x 500 (we can resize later), flood fill with white.

Open frame 07 - Copy, paste as a new layer, resize to fit.

Open paper 06 - Select inside of frame with magic wand, expand by 3, add new layer, floodfill with paper 06, select none, move underneath frame layer.

Open paper 08 - Copy, paste as a new layer, apply WSL220 mask, merge down.

Open wire - Copy, paste as a new layer, resize and move under frame background layer, duplicate, rotate, and move to top of frame, erasing any extra wire.

Open tube or image of choice - Copy, paste tube as new layer, make any resizing now. With the tube I used, I had to duplicate so the wings would be outside of the frame and I erased the bottom that hung over the frame also. Move one layer underneath the frame, and one on top.

Open assortment of elements - Copy, paste each as a new layer, resizing and rotating to your liking.

At this point, I usually resize if I need a smaller image. I also save both the original size and the smaller size images.

Add a new vector layer for you name, I flood filled mine with #808080, duplicate, convert top layer to raster, change blend mode to multiply to make it darker.

Go back through to sharpen and add a drop shadow to your layers.

Add your copyright as the finishing touch.

Save your tag in your favorite format and you are done!!

This tutorial was written by Debbie (Mystic Inc Design), 2009. Any resemblance to any other tutorial is purely coincidental and not intended.
Monday, December 21, 2009

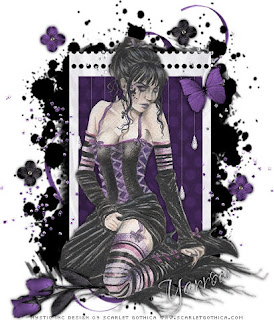
Villainess of Love


This tutorial was written for those that have a working knowledge of PSP (I use Version 9).

Artwork by Scarlet Gothica and you can find her here, she is a free to use artist.

Supplies Needed:

Tube or image of choice
Scrapkit: "Tainted Love" by Yarrow and can be purchased here.
Font(s): P22 Ruthie

Here we go!

Open a new image, 500 x 500 (we can resize later), flood fill with white.

Open frame1 - Copy, paste as a new layer, resize to fit, I rotated mine 90 degrees.

Open paper 4 - Select inside of frame with magic wand, expand by 3, add new layer, floodfill with paper 4, select none, move underneath frame layer.

Open tube or image of choice - Copy, paste tube as new layer, make any resizing now.

Open assortment of elements - Copy, paste each as a new layer, resizing and rotating to your liking.

At this point, I usually resize if I need a smaller image. I also save both the original size and the smaller size images.

Add a new vector layer for you name, I flood filled mine with paper 8, duplicate, convert top layer to raster, change blend mode to multiply to make it darker.

Go back through to sharpen and add a drop shadow to your layers.

Add your copyright as the finishing touch.

Save your tag in your favorite format and you are done!!

This tutorial was written by Debbie (Mystic Inc Design), 2009. Any resemblance to any other tutorial is purely coincidental and not intended.
Sunday, December 20, 2009

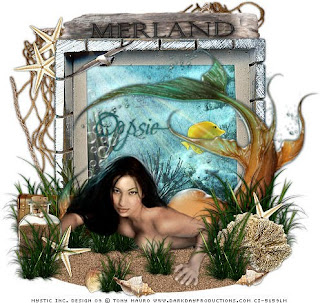
Merland


This tutorial was written for those that have a working knowledge of PSP (I use Version 9).

Artwork by Tony Mauro and you can find him here, he is a pay to use artist. At the time of my purchase, he was still selling with CILM.

Supplies Needed:

Tube or image of choice
Scrapkit: "Merland" by Oopsie Daisy and can be purchased here.
Font(s): Moon Dance Two

Here we go!

Open a new image, 500 x 500 (we can resize later), flood fill with white.

Open crateframe - Copy, paste as a new layer, resize to fit.

Open paper 1 - Copy, paste as a new layer, resize to fit right under frame opening, move down to bottom layer.

Open tube or image of choice - Copy, paste tube as new layer, make any resizing now.

Add new vector layer - Using the ellipse tool with foreground and background both using #846042, draw a shape to be the sand, convert to raster layer when ready, add noise of 35, with gaussian and monochrome both checked, move to bottom layer

Open assortment of elements - Copy, paste each as a new layer, resizing and rotating to your liking. Try to "layer" all the greenery to give the sand more depth.

At this point, I usually resize if I need a smaller image. I also save both the original size and the smaller size images.

Add a new vector layer for you name, I flood filled mine with paper 14.

Go back through to sharpen and add a drop shadow to your layers.

Add your copyright as the finishing touch.

Save your tag in your favorite format and you are done!!

This tutorial was written by Debbie (Mystic Inc Design), 2009. Any resemblance to any other tutorial is purely coincidental and not intended.
Sunday, December 13, 2009

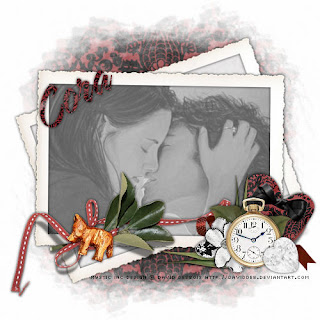
Love Me Forever


This tutorial was written for those that have a working knowledge of PSP (I use Version 9).

Image courtesy of David Desbois, he is a FTU artist with permission, and you can his wonderful Deviant Art site here.

Supplies Needed:

Tube or image of choice
Scrapkit: "The Saga - The Renewal" by Cora's Creations and can be purchased here.
Mask(s): Insatiable Dreams 164, which can be found here.
Font(s): Sarah Script

Here we go!

Open a new image, 500x500 (we can resize later).

Open old frame - Copy, paste as a new layer, resize to 80%, duplicate, rotate 20 degrees to either direction, move underneath original frame.

Open image or tube of choice - Select top frame in layer view, view current only, select inside of frame with magic wand, expand by 5, add new layer, floodfill with paper 07, copy tube or image of choice, paste as new layer, make any adjustments to size now (I adjusted hue and saturation to both 0), select none. Repeat process for bottom layer, omitting tube.

Open assortment of elements - Copy, paste each as a new layer, resizing and rotating to your liking.

At this point, I usually resize if I need a smaller image. I also save both the original size and the smaller size images.

Open paper 01 - Resize to 85%, copy, paste as a new layer, move to bottom, apply mask.

Add a new vector layer for your name - Floodfill with paper 09.

Go back through to sharpen and add a drop shadow to your layers.

Add your copyright as the finishing touch.

Save your tag in your favorite format and you are done!!

This tutorial was written by Debbie (Mystic Inc Design), 2009. Any resemblance to any other tutorial is purely coincidental and not intended.
Thursday, December 10, 2009

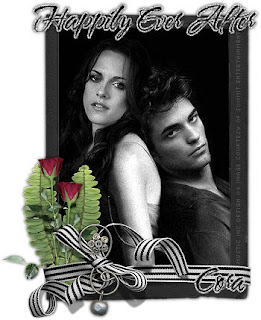
Happily Ever After


This tutorial was written for those that have a working knowledge of PSP (I use Version 9).

Image courtesy of Summit Entertainment.

Supplies Needed:

Tube or image of choice
Scrapkit: "The Saga - Happily Ever After" by Cora's Creations and can be purchased here.
Font(s): WaterBrush ROB

Here we go!

Open a new image, 500x500 (we can resize later).

Open frame 2 - Copy, paste as a new layer, rotate 90 degrees, resize if need be.

Open image or tube of choice - Mine did not need a background paper, so I copied and pasted as a new layer and moved underneath frame. If you need to fill with paper: Select inside of frame with magic wand, expand by 5, add new layer, floodfill with paper, select none, move underneath frame layer.

Open assortment of elements - Copy, paste each as a new layer, resizing and rotating to your liking.

At this point, I usually resize if I need a smaller image. I also save both the original size and the smaller size images.

Add a new vector layer for your name - Floodfill with black, duplicate, convert to raster layer, select all, use magic wand to select text, expand by 2, floodfill with #c0c0c0, add noise (uniform,50,monochrome checked), move underneath black text layer. Repeat for any text that you would like to add.

Go back through to sharpen and add a drop shadow to your layers.

Add your copyright as the finishing touch.

Save your tag in your favorite format and you are done!!

This tutorial was written by Debbie (Mystic Inc Design), 2009. Any resemblance to any other tutorial is purely coincedental and not intended.

Tuesday, December 8, 2009

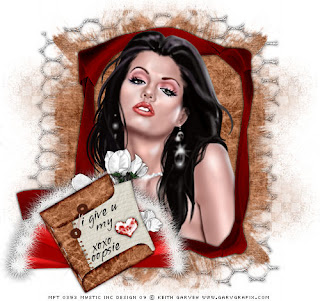
I Give U My Heart


This tutorial was written for those that have a working knowledge of PSP (I use Version 9).

Artwork by Keith Garvey and he is a pay to use artist, you can currently find him here. Please make sure that you have the appropriate My PSP Tubes or PSP Tubes Emporium artist license to use the same tube as I do.

Supplies Needed:

Tube or image of choice
Scrapkit: "Mi Amor" by Oopsie Daisy and can be purchased here.
Mask(s): Vix Mask 349, you can find it here.
Font(s): Vujahday Plain

Here we go!

Open a new image, 500x500 (we can resize later).

Open red ribbon frame - Copy, paste as a new layer, resize to fit, duplicate, change top layer's blend mode to multiply.

Open paper 5 - Copy, paste as a new layer, apply mask, merge down, duplicate, mirror, duplicate, flip, duplicate, mirror.

Open tube or image of choice - Copy, paste tube as new layer, make any resizing now, move to underneath frame layer, duplicate, move copy on top of frame layer and erase any parts that "hang over".

Open assortment of elements - Copy, paste each as a new layer, resizing and rotating to your liking.

At this point, I usually resize if I need a smaller image. I also save both the original size and the smaller size images.

Add a new vector layer for your text, you will need to rotate to the same degree that you rotated your envelope.

Add a new vector layer for you name, you will also need to rotate this layer.

Go back through to sharpen and add a drop shadow to your layers.

Add your copyright as the finishing touch.

Save your tag in your favorite format and you are done!!

This tutorial was written by Debbie (Mystic Inc Design), 2009. Any resemblance to any other tutorial is purely coincedental and not intended.

Tuesday, December 1, 2009

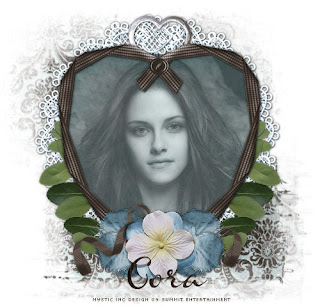
Bella


This tutorial was written for those that have a working knowledge of PSP (I use Version 9).

Image courtesy of Summit Entertainment.

Supplies Needed:

Tube or image of choice
Scrapkit: "Bella" which is part of "The Saga" by Cora's Creations and can be purchased here.
Mask(s): Vix Mask 403, you can find it here.
Font(s): Scrap Cursive

Here we go!

Open a new image, 500x500 (we can resize later).

Open ribbon heart 2 - Copy, paste as a new layer, resize.

Open paper 3 - Select inside of bottom frame with magic wand, expand by 5, add new layer, floodfill with paper 3, select none, move underneath frame layer.

Open lace heart - copy, paste as a new layer, move underneath background layer, resize.

Open paper 08 - resize 90%, copy and paste as a new layer, moving to the bottom and apply mask.

Open tube or image of choice - Copy, paste tube as new layer, make any resizing now, and move under the top frame. For the tube, I duplicated it, blurred with a radius of 3, and changed blend mode to softlight.

Open assortment of elements - Copy, paste each as a new layer, resizing and rotating to your liking.

At this point, I usually resize if I need a smaller image. I also save both the original size and the smaller size images.

Add a new vector layer for your name - (I floodfilled mine with paper 6) To make it stand out, use could use either Eye Candy or duplicate the layer, convert bottom layer to raster, select all, use magic wand to select text, expand by 2, floodfill with white.

Go back through to sharpen and add a drop shadow to your layers. Make sure when you add the shadow to the lace layer that you lighten the amount.

Add your copyright as the finishing touch.

Save your tag in your favorite format and you are done!!

This tutorial was written by Debbie (Mystic Inc Design), 2009. Any resemblance to any other tutorial is purely coincedental and not intended.

Monday, November 23, 2009

Present for Santa


This tutorial was written for those that have a working knowledge of PSP (I use Version 9).

Artwork by Keith Garvey and you can find his artwork at MPT. Please make sure that you have the appropriate My PSP Tubes artist license to use the same tube as I do.

Supplies Needed:

Tube or image of choice
Scrapkit: "White Christmas" by Cora's Creations and can be purchased here.
Font(s): Mistral

Here we go!

Open a new image, 500x500 (we can resize later).

Open frame 1 - Copy, paste as a new layer, resize to fit.

Open frame 3 - Copy, paste as a new layer, resize to fit on top of frame 1.

Open paper 8 - Select inside of frame 1 with magic wand, expand by 5, add new layer, floodfill with paper 8, select none, move underneath frame layer.

Open tube or image of choice - Copy, paste tube as new layer, make any resizing now, and move under frame 3. Paste another copy of tube on the top layer, resize if necessary.

Open assortment of elements - Copy, paste each as a new layer, resizing and rotating to your liking.

Open stars - Copy, paste as a new layer, move to bottom, duplicate and rotate to make a nice border.

At this point, I usually resize if I need a smaller image. I also save both the original

size and the smaller size images.

Add a new vector layer for your name - (I floodfilled mine with #850808).

Go back through to sharpen and add a drop shadow to your layers.

Add your copyright as the finishing touch.

Save your tag in your favorite format and you are done!!

This tutorial was written by Debbie (Mystic Inc Design), 2009. Any resemblance to any other tutorial is purely coincidental and not intended.
Sunday, November 22, 2009

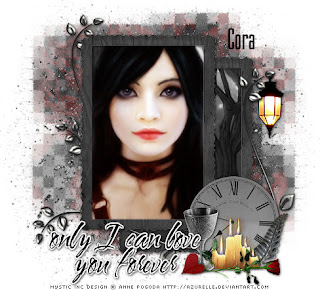
Only I Can Love You Forever


This tutorial was written for those that have a working knowledge of PSP (I use Version 9).

Artwork by Anne Pogoda and you can find her here, she is a free to use artist.

Supplies Needed:

Tube or image of choice
Scrapkit: "Fangtasia" by Cora's Creations and can be purchased here.
Mask(s): Vix Mask 365, you can find it here.
Font(s): Mekanik and WaterBrush ROB

Here we go!

Open a new image, 500x500 (we can resize later), flood fill with paper 9, I resized to 90%. Apply mask, after I merged the layer, I resized to 110%, moved a bit, then
duplicated to make darker.

Open frame 2 - Copy, paste as a new layer, rotate 90 degrees, resize, then duplicate and arrange to the right.

Open paper 1 - Select inside of bottom frame with magic wand, expand by 3, add new layer, floodfill with paper 1, select none, move underneath frame layer.

Open tube or image of choice - Copy, paste tube as new layer, make any resizing now, and move under the top frame. Depending on choice of tube, you may have to use a background paper as I did (paper 1). For the tube, I duplicated it, blurred with a radius of 3, and changed blend mode to softlight.

Open assortment of elements - Copy, paste each as a new layer, resizing and rotating to your liking.

Open splatter - Copy, paste as a new layer, move to bottom, right above mask layer, duplicate, rotate, duplicate, mirror.

At this point, I usually resize if I need a smaller image. I also save both the original size and the smaller size images.

Add a new vector layer for your name - (I floodfilled mine with black) To make it stand out, use could use either Eye Candy or duplicate the layer, convert bottom layer to raster, select all, use magic wand to select text, expand by 2, floodfill with white.

Go back through to sharpen and add a drop shadow to your layers.

Add your copyright as the finishing touch.

Save your tag in your favorite format and you are done!!

This tutorial was written by Debbie (Mystic Inc Design), 2009. Any resemblance to any other tutorial is purely coincidental and not intended.

Tuesday, November 17, 2009

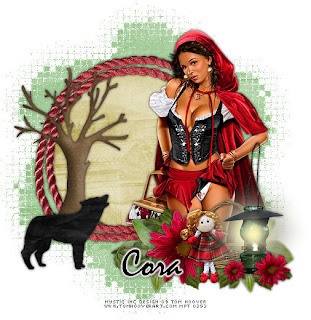
A Howling Good Time


This tutorial was written for those that have a working knowledge of PSP (I use Version 9).

Artwork by Tom Hoover and you can find him at MPT. Please make sure that you have the appropriate My PSP Tubes artist license to use the same tube as I do.

Supplies Needed:

Tube or image of choice
Scrapkit: "Red Riding Hood" by Cora's Creations and can be purchased here.
Mask(s): Vix Mask 371, you can find it here.
Font(s): Mistral

Here we go!

Open a new image, 600x600 (we can resize later), flood fill with paper 3.

Open frame 1 - Copy, paste as a new layer, resize if necessary, and flip.

Open paper 6 - Select inside of frame with magic wand, expand by 5, add new layer, floodfill with paper 6, select none, move underneath frame layer. I duplicated this layer and used the adjust hue and saturation to make it a little more brown.

Open tube or image of choice - Copy, paste tube as new layer, make any resizing now.

Open assortment of elements - Copy, paste each as a new layer, resizing and rotating to your liking. The tree I duplicated, then changed the top layer to multiply.

At this point, I usually resize if I need a smaller image. I also save both the original size and the smaller size images.

Add a new vector layer for your name - (I floodfilled mine with black) To make it stand out, use could use either Eye Candy or duplicate the layer, convert bottom layer to raster, select all, use magic wand to select text, expand by 2, floodfill with white.

Go back through to sharpen and add a drop shadow to your layers.

Add your copyright as the finishing touch.

Save your tag in your favorite format and you are done!!

This tutorial was written by Debbie (Mystic Inc Design), 2009. Any resemblance to any other tutorial is purely coincidental and not intended.
Saturday, November 14, 2009

Holiday Dreams


This tutorial was written for those that have a working knowledge of PSP (I use Version 9).

Artwork by Eugene Rzhesvskii and you can find him at MPT. Please make sure that you have the appropriate My PSP Tubes artist license to use the same tube as I do.

Supplies Needed:

Tube or image of choice
Scrapkit: "Pink Holiday" by Cora's Creations and can be purchased here.
Mask(s): Vix Christmas Mask 5, you can find it here.
Font(s): MeaCulpa

Here we go!

Open a new image, 600x600 (we can resize later), flood fill with paper 6.

Open frame 5 - Copy, paste as a new layer, resize if necessary, and flip.

Open paper 3 - Select inside of frame with magic wand, expand by 3, add new layer, floodfill with paper 3, select none, move underneath frame layer.

Open tube or image of choice - Copy, paste tube as new layer, make any resizing now, duplicate and move one layer over frame, one under. Erase any parts of legs that hang over the frame on both layers.

Open assortment of elements - Copy, paste each as a new layer, resizing and rotating to your liking.

At this point, I usually resize if I need a smaller image. I also save both the original size and the smaller size images.

Add a new vector layer for your name - (I floodfilled mine with paper 6). If you'd like it darker, duplicate the layer.

Go back through to sharpen and add a drop shadow to your layers.

Add your copyright as the finishing touch.

Save your tag in your favorite format and you are done!!

This tutorial was written by Debbie (Mystic Inc Design), 2009. Any resemblance to any other tutorial is purely coincidental and not intended.
Saturday, September 5, 2009

Spell Gone Wrong


This tutorial was written for those that have a working knowledge of PSP (I use Version 9).

Supplies Needed:

Tube or image of choice: I used the cat supplied in kit
Scrapkit: "Eye of Newt" by Cora's Creations and can be purchased here.
Mask(s): Boundless Bliss grunge1, you can find it here.
Font(s): The King and Queen

Here we go!

Open a new image, 600x600 (we can resize later), flood fill with white.

Open frame3 - Copy, paste as a new layer, resize if necessary.

Open paper6 - Copy, paste as a new layer, apply mask, merge down, resize to fit frame.

Open paper10 - Copy, paste as a new layer, resize to if necessary, erase anything outside of frame, move underneath frame layer.

Open tube or image of choice - Copy, paste tube as new layer, make any resizing now.

Open assortment of elements - Copy, paste each as a new layer, resizing and rotating to your liking.

At this point, I usually resize if I need a smaller image. I also save both the original size and the smaller size images.

Add a new vector layer for your name - (I floodfilled mine with paper17) To make it stand out, use could use either Eye Candy or duplicate the layer, convert bottom layer to raster, select all, use magic wand to select text, expand by 2, floodfill with white.

Go back through to sharpen and add a drop shadow to your layers.

Add your copyright as the finishing touch.

Save your tag in your favorite format and you are done!!

This tutorial was written by Debbie (Mystic Inc Design), 2009. Any resemblance to any other tutorial is purely coincidental and not intended.

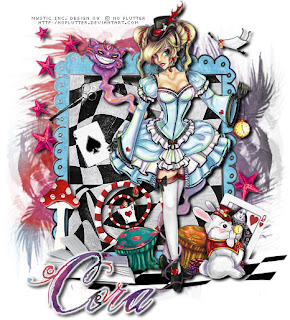
Alice's Dreamland


This tutorial was written for those that have a working knowledge of PSP (I use Version 9).

Artwork courtesy of No Flutter and she can be found here.

Supplies Needed:

Tube or image of choice
Scrapkit: "Other Side of Wonderland" by Cora's Creations and can be purchased here.
Mask(s): Weescotslass Mask 59, you can find it here.
Font(s): The King and Queen

Here we go!

Open a new image, 600x600 (we can resize later), flood fill with white.

Open frame4 - Copy, paste as a new layer, resize if necessary.

Open paper11 - Copy, paste as a new layer, apply WSL59 mask, merge down, resize to fit frame.

Open paper12 - Select inside of frame with magic wand, expand by 5, add new layer, floodfill with paper12, select none, move underneath frame layer.

Open tube or image of choice - Copy, paste tube as new layer, make any resizing now.

Open assortment of elements - Copy, paste each as a new layer, resizing and rotating to your liking.

At this point, I usually resize if I need a smaller image. I also save both the original size and the smaller size images.

Add a new vector layer for your name - (I floodfilled mine with paper11) To make it stand out, use could use either Eye Candy or duplicate the layer, convert bottom layer to raster, select all, use magic wand to select text, expand by 2, floodfill with white.

Go back through to sharpen and add a drop shadow (I used V2, H4, Opac100, Blur6, Color Black) to your layers.

Add your copyright as the finishing touch.

Save your tag in your favorite format and you are done!!

This tutorial was written by Debbie (Mystic Inc Design), 2009. Any resemblance to any other tutorial is purely coincidental and not intended.

Saturday, August 22, 2009

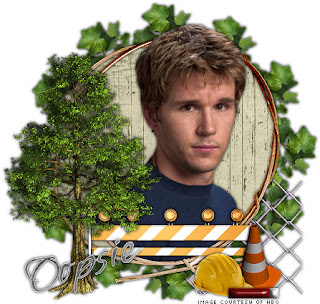
Mr. January


This tutorial was written for those that have a working knowledge of PSP (I use Version 9).

Image courtesy of HBO.

Supplies Needed:

Tube or image of choice
Scrapkit: "Bon Temps Collection - True Blood" by "Oopsie Daisy" and can be purchased here.
Font(s): Sheer Elegance

Here we go!

Open a new image, 600x600 (we can resize later), flood fill with white.

Open frame1 - Copy, paste as a new layer, resize if necessary.

Open tube or image of choice - Copy, paste tube as new layer, make any resizing now, move underneath frame layer.

Open leaves2 - Copy, paste each as a new layer, resize, rotate to your liking, place on top of original frame leaves, duplicate, rotate 90 degrees, arrange over other leaf.

Open floral3 - Copy, paste as a new layer, resize, place on top of both leaves.

Open ribbon - Copy, paste as a new layer, resize, place on top of frame layer.

At this point, I usually resize if I need a smaller image. I also save both the original size and the smaller size images.

Add a new vector layers for your name and any text you would like to add.

Go back through to sharpen and add a drop shadow to your layers (I did not dropshadow frame).

Add your copyright as the finishing touch.

Save your tag in your favorite format and you are done!!

This tutorial was written by Debbie (Mystic Inc Design), 2009. Any resemblance to any other tutorial is purely coincidental and not intended.
Snacktime (Tru Blood)


This tutorial was written for those that have a working knowledge of PSP (I use Version 9).

Image courtesy of HBO.

Supplies Needed:

Tube or image of choice
Scrapkit: "Bon Temps Collection - True Blood" by "Oopsie Daisy" and can be purchased here
Mask(s): Weescotslass Mask 84, you can find it here.
Font(s): Wide Latin, Arial Narrow, Ephesis, Endor Alt

Here we go!

Open a new image, 600x600 (we can resize later), flood fill with white.

Open paper12 - Copy, paste as a new layer, apply WSL84 mask, merge down.

Open bracketframe2 - Copy, paste as a new layer, resize if necessary.

Open mesh - Copy, paste as a new layer, resize if necessary, move underneath frame layer.

Open tube or image of choice - Copy, paste tube as new layer, make any resizing now.

Open assortment of flowers and other elements of choice - Copy, paste each as a new layer, resizing and rotating to your liking.

At this point, I usually resize if I need a smaller image. I also save both the original size and the smaller size images.

Add a new vector layer for your name (Ephesis) - I floodfilled mine with paper2 & foreground black.

Add a new vector layer for bottle text (Endor Alt) - I floodfilled mine with paper2.

Add a new vector layer for 3 am text - I floodfilled mine with paper2.

Add a new vector layer for ad text - (I floodfilled mine with paper12) To make it stand out, duplicate the layer, convert bottom layer to raster, select all, use magic wand to select text, expand by 2, floodfill with #c0c0c0, Adjust, Add/Remove Noise, Add Noise, Uniform checked, Noise 100%, Monochrome checked.

Go back through to sharpen and add a drop shadow to your layers.

Add your copyright as the finishing touch.

Save your tag in your favorite format and you are done!!

This tutorial was written by Debbie (Mystic Inc Design), 2009. Any resemblance to any other tutorial is purely coincidental and not intended.

Sam


This tutorial was written for those that have a working knowledge of PSP (I use Version 9).

Image courtesy of HBO.

Supplies Needed:

Tube or image of choice
Scrapkit: "Bon Temps Collection - Sam" by "Oopsie Daisy" and can be purchased here.
Mask(s): Weescotslass Mask 116, you can find it here.
Font(s): Whisper

Here we go!

Open a new image, 600x600 (we can resize later), flood fill with white.

Open frame4 - Copy, paste as a new layer, resize if necessary.

Open paper1 - Copy, paste as a new layer, move underneath frame layer, apply WSL16 mask, merge down, duplicate if you'd like it a little darker.

Open paper2 - Select inside of frame with magic wand, expand by 5, add new layer, floodfill with paper2, select none, move underneath frame layer.

Open tube or image of choice - Copy, paste tube as new layer, make any resizing now.

Open another tube - I used a collie picture that I had, copy, paste as a new layer, drop opacity to 38.

Open assortment of flowers and other elements of choice - Copy, paste each as a new layer, resizing and rotating to your liking.

At this point, I usually resize if I need a smaller image. I also save both the original size and the smaller size images.

Add a new vector layer for your name - (I floodfilled mine with paper1) To make it stand out, use could use either Eye Candy or duplicate the layer, convert bottom layer to raster, select all, use magic wand to select text, expand by 2, floodfill with white.

Go back through to sharpen and add a drop shadow to your layers.

Add your copyright as the finishing touch.

Save your tag in your favorite format and you are done!!

This tutorial was written by Debbie (Mystic Inc Design), 2009. Any resemblance to any other tutorial is purely coincidental and not intended.
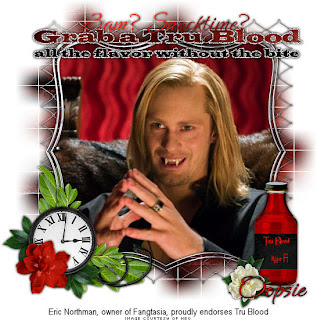
Lafayette


This tutorial was written for those that have a working knowledge of PSP (I use Version 9).

Image courtesy of HBO.

Supplies Needed:

Tube or image of choice
Scrapkit: "Bon Temps Collection - Lafayette" by "Oopsie Daisy" and can be purchased here.
Mask(s): Weescotslass Mask 355, you can find it here.
Font(s): Snagglepuss

Here we go!

Open a new image, 600x600 (we can resize later), flood fill with white.

Open frame1 - Copy, paste as a new layer, resize to your liking.

Open paper2 - Copy, paste as a new layer, move underneath frame layer, apply WSL355 mask, merge down, use deform raster tool to "shrink" it closer to the frame.

Open beads - Copy, paste as a new layer, move underneath frame.

Open screwhead - Copy, paste as a new layer, resize considerably, move to left corner of frame, duplicate, mirror.

Open tube or image of choice - Copy, paste tube as new layer, make any resizing now, and if necessary, move underneath frame layer.

Open assortment of flowers and other elements of choice - Copy, paste each as a new layer, resizing and rotating to your liking.

At this point, I usually resize if I need a smaller image. I also save both the original size and the smaller size images.

Add a new vector layer for your name - (I floodfilled mine with paper11) To make it stand out I duplicated then dropshadowed top layer.

Go back through to sharpen and add a drop shadow to your layers.

Add your copyright as the finishing touch.

Save your tag in your favorite format and you are done!!

This tutorial was written by Debbie (Mystic Inc Design), 2009. Any resemblance to any other tutorial is purely coincidental and not intended.

Saturday, August 8, 2009

Vampire Bill


This tutorial was written for those that have a working knowledge of PSP (I use Version 9).

Image courtesy of HBO.

Supplies Needed:

Tube or image of choice
Scrapkit: "Bon Temps Collection - Bill" by "Oopsie Daisy" and can be purchased here
Mask(s): Weescotslass Mask 165, you can find it here.
Font(s): Whisper

Here we go!

Open a new image, 600x600 (we can resize later), flood fill with white.

Open ribbon frame - Copy, paste as a new layer, resize if necessary, I duplicated the layer and set the top blend mode to multiply to make it darker.

Open paper7 - Select inside of frame (the orignal layer) with magic wand (make sure to get all the parts), expand by 3, add new layer, floodfill with paper7, select none, move underneath frame layer.

Open paper7 - Copy, paste as a new layer, apply WSL165 mask, merge down, and move to bottom layer.

Open tube or image of choice - Copy, paste tube as new layer, make any resizing now.

Open assortment of elements of choice - Copy, paste each as a new layer, resizing and rotating to your liking.

At this point, I usually resize if I need a smaller image. I also save both the original size and the smaller size images.

Add a new vector layer for your name.

Go back through to sharpen and add a drop shadow to your layers.

Add your copyright as the finishing touch.

Save your tag in your favorite format and you are done!!

This tutorial was written by Debbie (Mystic Inc Design), 2009. Any resemblance to any other tutorial is purely coincidental and not intended.
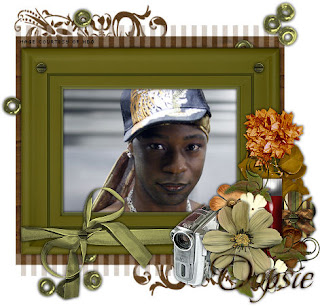
Sookie


This tutorial was written for those that have a working knowledge of PSP (I use Version 9).

Image courtesy of HBO.

Supplies Needed:

Tube or image of choice
Scrapkit: "Bon Temps Collection - Sookie" by "Oopsie Daisy" and can be purchased here.
Mask(s): Weescotslass Mask 12, you can find it here.
Font(s): WaterBrush ROB

Here we go!

Open a new image, 600x600 (we can resize later), flood fill with white.

Open paper7 - Copy, paste as a new layer, apply WSL12 mask, merge down, duplicate if you'd like it a little darker.

Open ribbon frame - Copy, paste as a new layer, resize if necessary.

Open paper4 - Select inside of frame with magic wand, expand by 2, add new layer, floodfill with paper4, select none, move underneath frame layer.

Open tube or image of choice - Copy, paste tube as new layer, make any resizing now.

Open assortment of flowers and other elements of choice - Copy, paste each as a new layer, resizing and rotating to your liking.

At this point, I usually resize if I need a smaller image. I also save both the original size and the smaller size images.

Add a new vector layer for your name - (I floodfilled mine with paper1) To make it stand out, use could use either Eye Candy or duplicate the layer, convert bottom layer to raster, select all, use magic wand to select text, expand by 2, floodfill with white.

Go back through to sharpen and add a drop shadow to your layers.

Add your copyright as the finishing touch.

Save your tag in your favorite format and you are done!!

This tutorial was written by Debbie (Mystic Inc Design), 2009. Any resemblance to any other tutorial is purely coincidental and not intended.
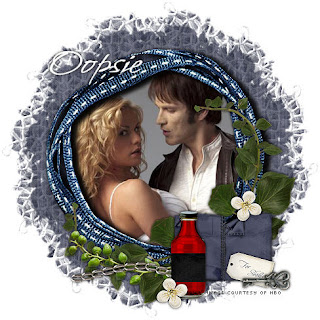
Jason


This tutorial was written for those that have a working knowledge of PSP (I use Version 9).

Image courtesy of HBO.

Supplies Needed:

Tube or image of choice
Scrapkit: "Bon Temps Collection - Jason" by "Oopsie Daisy" and can be purchased here.
Filter(s): MuRa's Meister Copies
Font(s): Vujahday Script

Here we go!

Open a new image, 600x600 (we can resize later), flood fill with white.

Open string frame - Copy, paste as a new layer, resize if necessary.

Open paper2 - Select inside of frame with magic wand, expand by 6, add new layer, floodfill with paper2, select none, move underneath frame layer.

Open greenery - Copy, paste as a new layer, resize, use MuRa's Meister Copies and the encircle setting to make a ring around the frame, move underneath frame background layer.

Open tube or image of choice - Copy, paste tube as new layer, make any resizing now.

Open assortment of elements of choice - Copy, paste each as a new layer, resizing and rotating to your liking.

At this point, I usually resize if I need a smaller image. I also save both the original size and the smaller size images.

Add a new vector layer for your name - (I floodfilled mine with paper1) To make it stand out, I had the foreground activated with white.

Go back through to sharpen and add a drop shadow to your layers.

Add your copyright as the finishing touch.

Save your tag in your favorite format and you are done!!

This tutorial was written by Debbie (Mystic Inc Design), 2009. Any resemblance to any other tutorial is purely coincidental and not intended.
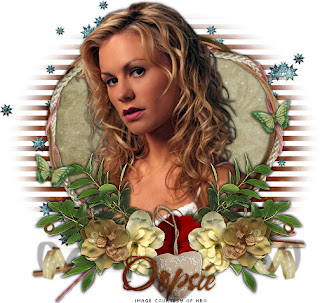
Tara


This tutorial was written for those that have a working knowledge of PSP (I use Version 9).

Image courtesy of HBO.

Supplies Needed:

Tube or image of choice
Scrapkit: "Bon Temps Collection - Tara" by "Oopsie Daisy" and can be purchased here.
Mask(s): Weescotslass Masks 149 and 169, you can find them here.
Font(s): WaterBrush ROB

Here we go!

Open a new image, 600x600 (we can resize later), flood fill with white.

Open paper10 - Copy, paste as a new layer, apply WSL149 mask, merge down, duplicate if you'd like it a little darker.

Open frame2 - Copy, paste as a new layer, resize if necessary.

Open paper1 - Select inside of frame2 with magic wand, expand by 4, add new layer, floodfill with paper1, select none, move underneath frame layer.

Open paper12 - Copy, paste as a new layer, move layer underneath frame background layer, apply WSL169 mask, use the raster deform tool to make it come closer to the frame, merge down, duplicate if you'd like it a little darker.

Open tube or image of choice - Copy, paste tube as new layer, make any resizing now.

Open assortment of flowers and other elements of choice - Copy, paste each as a new layer, resizing and rotating to your liking.

At this point, I usually resize if I need a smaller image. I also save both the original size and the smaller size images.

Add a new vector layer for your name - To make it stand out, use could use either Eye Candy or duplicate the layer, convert bottom layer to raster, select all, use magic wand to select text, expand by 2, floodfill with white.

Go back through to sharpen and add a drop shadow to your layers.

Add your copyright as the finishing touch.

Save your tag in your favorite format and you are done!!

This tutorial was written by Debbie (Mystic Inc Design), 2009. Any resemblance to any other tutorial is purely coincidental and not intended.
Thursday, July 23, 2009

Goodnight Little Lamb


This tutorial was written for those that have a working knowledge of PSP (I use Version 9).

Supplies Needed:

Tube of choice: I used the sheep that were included in the kit.
Scrapkit: "Goodnight Little Lamb" by "Missy Lynn Scraps" and can be purchased from here.
Plugin(s): Alien Skin Eye Candy - Gradient Glow (not necessary)
Mask(s): Masks 340 & 351 by Vix which you can find here.
Font(s): Saginaw

Here we go!

Open a new image, 600x600 (we can resize later), flood fill with white.

Open paper1 - Add a new vector layer, draw out a square with foreground null and background

set with paper1, convert to raster layer, select all, contract by 10, delete button.

Duplicate frame and rotate to the left, duplicate original frame, rotate to the right.

Open paper2 - Resize paper by 30% or so depending on how big you made your frames. Click inside the first frame, copy and paste paper2 as a new layer, invert, make sure your current layer is the star paper and delete. Repeat for the other two frames, rotating your paper for each before you invert and delete. Make sure all of the paper layers are underneath your frame layers.

Open paper5 & paper6 - Copy, paste paper 8 as a new layer, apply mask of choice, merge layers, repeat process with paper6 using the other mask, merge layers, move both layers underneath the frame fill papers.

Open an assortment of elements that you would like to use - Copy, paste as new layers, resizing and rotating to your liking.

At this point, I usually resize if I need a smaller image. I also save both the original size and the smaller size images.

Add a new vector layer for your name, I floodfilled mine with paper6.

There are two ways to put the glow around the text:

Old fashioned way: Duplicate layer, convert to raster, select all, use magic wand to select text, enlarge by 2, floodfill with paper5, move underneath text layer.

With Gradient Glow - I still duplicate the layer so I have the original if I want to change the name on it, convert to raster layer, effects, gradient glow, I use the settings: outside glow checked, mask selection checked, 5, 25, 100, 0, 100, 100, white or another color (I chose one that would match paper5), random seed 1, ok, close off original text layer.

Go back through to sharpen and add a drop shadow to each of your layers that need it.

Add your copyright as the finishing touch.

Save your tag in your favorite format and you are done!!

This tutorial was written by Debbie (Mystic Inc Design), 2009. Any resemblance to any other tutorial is purely coincidental and not intended.

Wednesday, July 22, 2009

A Romantic Evening Away


This tutorial was written for those that have a working knowledge of PSP (I use Version 9).

Artwork courtesy of Darin Michau and you can find him here.

Supplies Needed:

Tube of choice
Scrapkit: "Warm Summer Nights" by "Missy Lynn Scraps" and can be purchased from here.
Mask(s): Mask 147 by Vix and you can find it here.
Font(s): Rage Italic

Here we go!

Open a new image, 600x600 (we can resize later), flood fill with white.

Open frame4 - Copy, paste as a new layer, resize and rotate to your liking.

Open paper14 & paper17- Click inside the frame using the magic wand, expand by 5, add a new layer, floodfill with paper14, DO NOT DESELECT. Add a new layer, floodfill with paper 17, deselect. Colorize paper14 to 0,0, move underneath frame4 layer, move paper17 layer underneath paper14 layer. Change opacity on paper14 to 40%.

Open paper8 & paper9 - Copy, paste paper 8 as a new layer, apply mask, merge layers, repeat process with paper9 and after merging, rotate 90 degrees. Move both layers underneath paper 17 layer.

Open an assortment of elements that you would like to use - Copy, paste as new layers, resizing and rotating to your liking.

At this point, I usually resize if I need a smaller image. I also save both the original size and the smaller size images.

Open tube of choice - Copy, paste as a new layer, resize, rotate, or change blend mode to your liking.

Add a new vector layer for your name.

There are two ways to put the white around the text:

Old fashioned way: Duplicate layer, convert to raster, select all, use magic wand to select text, enlarge by 2, floodfill with white, move underneath text layer.

With Gradient Glow - I still duplicate the layer so I have the original if I want to change the name on it, convert to raster layer, effects, gradient glow, I use the settings: outside glow checked, mask selection checked, 5, 25, 100, 0, 100, 100, white, random seed 1, close off original text layer.

Go back through to sharpen and add a drop shadow to each of your layers that need it.

Add your copyright as the finishing touch.

Save your tag in your favorite format and you are done!!

This tutorial was written by Debbie (Mystic Inc Design), 2009. Any resemblance to any other tutorial is purely coincidental and not intended.

After the Rain


This tutorial was written for those that have a working knowledge of PSP (I use Version 9).

Artwork courtesy of Zindy SD Nielson and you can find her here. Please make sure that you have the appropriate artist license to use the same tube as I do.

Supplies Needed:

Tube of choice
Scrapkit: "Country Side Moments" by "Missy Lynn Scraps" and can be purchased from here.
Font(s): Carlotta

Here we go!

Open a new image, 600x600 (we can resize later), flood fill with white.

Open frame2 - Copy, paste as a new layer, resize and rotate to your liking.

Open rainbow - Copy, paste as a new layer, resize if necessary, I did not drop shadow this layer.

Open an assortment of elements that you would like to use - Copy, paste as new layers, resizing and rotating to your liking.

At this point, I usually resize if I need a smaller image. I also save both the original size and the smaller size images.

Open tube of choice - Copy, paste as a new layer, resize, rotate, or change blend mode to your liking.

Add a new vector layer for your name - I floodfilled mine with paper12.

Go back through to sharpen and add a drop shadow to each of your layers that need it.

Add your copyright as the finishing touch.

Save your tag in your favorite format and you are done!!

This tutorial was written by Debbie (Mystic Inc Design), 2009. Any resemblance to any other tutorial is purely coincidental and not intended.

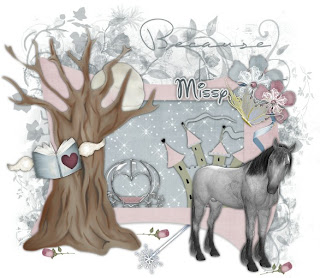
Fairytales Do Come True


This tutorial was written for those that have a working knowledge of PSP (I use Version 9).

Supplies Needed:

Tube of choice (I used the horse from the kit)
Scrapkit: "My Fairytale" by "Missy Lynn Scraps" and can be purchased from here.
Plugin(s): Xenofex Constellation
Mask(s): Dreaming1 by Sabre which you can find here.
Font(s): Walt Disney Script (well it is a fairytale kit)

Here we go!

Open a new image, 600x600 (we can resize later), flood fill with white.

Open paper8 - Copy, paste as a new layer, apply mask, merge down.

Open frame1 - Copy, paste as a new layer, resize to your liking.

Open paper4 - Click inside the frame using the magic wand, expand by 6, add a new layer, floodfill with paper4, (this part is optional) while selected, add a new layer, floodfill with white, effects - xenofex - constellation - 5,50,50,9,50,75, rotate at 45, make selection transparent, move both layers underneath frame1 layer.

Open the elements that you would like to use - Copy, paste as new layers, resizing, rotating, etc. to your liking.

At this point, I usually resize if I need a smaller image. I also save both the original size and the smaller size images.

Add a new vector layer for your name - I floodfilled mine with paper8.

Go back through to sharpen and add a drop shadow to each of your layers.

Add your copyright as the finishing touch.

Save your tag in your favorite format and you are done!!

This tutorial was written by Debbie (Mystic Inc Design), 2009. Any resemblance to any other tutorial is purely coincidental and not intended.

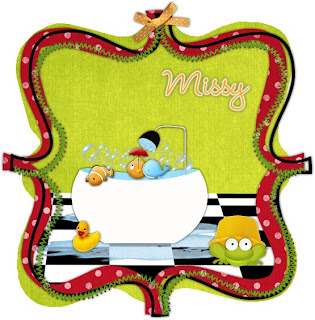
Bathtime


This tutorial was written for those that have a working knowledge of PSP (I use Version 9).

Supplies Needed:

Tube of choice (I didn't use one for this tag)
Scrapkit: "Bathtime Toys" by "Missy Lynn Scraps" and can be purchased from here.
Plugin(s): Alien Skin Eye Candy - Gradient Glow (optional)
Font(s): Wendy Medium

Here we go!

Open a new image, 600x600 (we can resize later), flood fill with white.

Open frame2 - Copy, paste as a new layer, resize to your liking.

Open paper1 - Click inside the frame using the magic wand, expand by 40, add a new layer, floodfill with paper1, move underneath frame2 layer.

Open floor - Copy, paste as a new layer, resize if necessary. I did not, I just used the eraser tool to erase what hung out from underneath the frame.

Open whatever elements you would like to use - Copy, paste as new layers, resizing to your liking.

At this point, I usually resize if I need a smaller image. I also save both the original size and the smaller size images.

Add a new vector layer for your name - I floodfilled mine with paper3.

There are two ways to put the white around the text:

Old fashioned way: Duplicate layer, convert to raster, select all, use magic wand to select text, enlarge by 2, floodfill with white, move underneath text layer.

With Gradient Glow - I still duplicate the layer so I have the original if I want to change the name on it, convert to raster layer, effects, gradient glow, I use the settings: outside glow checked, mask selection checked, 5, 25, 100, 0, 100, 100, white, random seed 1, close off original text layer.

Go back through to sharpen and add a drop shadow to each of your layers that need it.

Add your copyright as the finishing touch.

Save your tag in your favorite format and you are done!!

This tutorial was written by Debbie (Mystic Inc Design), 2009. Any resemblance to any other tutorial is purely coincidental and not intended.
Monday, July 20, 2009

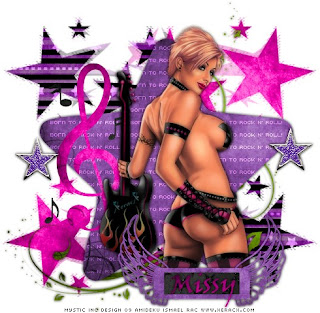
Born to Rock n Roll


This tutorial was written for those that have a working knowledge of PSP (I use Version 9).

Artwork courtesy of Ismael Rac and you can find him here. Please make sure that you have the appropriate Xeracx artist license to use the same tube as I do.

Supplies Needed:

Tube of choice
Scrapkit: "Poisoned Rock" by "Missy Lynn Scraps" and can be purchased here
Mask(s): Mask 112 by Vix which you can find here.
Template(s): Kristin's that you can find here.
Font(s): Viner Hand ITC

Here we go!

Open template, close off the credits layer. I like to leave it so I can go back later in case I forget who made the template =)

Change the text layer blend to overlay.

Add a new layer, floodfill with paper2, apply mask 112, merge group, move to bottom.

Add a new layer, floodfill with paper12, apply mask 112, merge group, mirror.

Select star - floodfill with paper11, delete original layer.

Select music staff - floodfill with paper12, delete original layer.

Select little music notes - floodfill with paper6, delete original layer.

Select doodle - floodfill with paper8, delete original layer.

Open star1 - copy, paste as a new layer, resize to your liking, and arrange to more even out the stars.

At this point, I usually resize if I need a smaller image. I also save both the original size and the smaller size images.

Open tube of choice - copy, paste as a new layer, resize if necessary, duplicate, add gaussian blur of 3 to top layer, change blend mode to multiply, change opacity to 74.

Open wings1 - copy, paste as a new layer, resize over tube.

Add a new vector layer for your name, I used paper12 as a floodfill, then duplicated it to make it darker.

Go back through to sharpen and add a drop shadow to your layers.

Add your copyright as the finishing touch.

Save your tag in your favorite format and you are done!!

This tutorial was written by Debbie (Mystic Inc Design), 2009. Any resemblance to any other tutorial is purely coincidental and not intended.
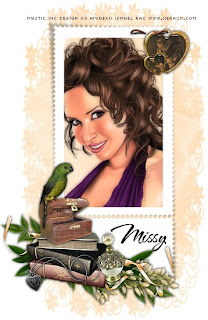
Treasures


This tutorial was written for those that have a working knowledge of PSP (I use Version 9).

Artwork courtesy of Ismael Rac and you can find him here. Please make sure that you have the appropriate Xeracx artist license to use the same tube as I do.

Supplies Needed:

Tube of choice
Scrapkit: "Wings of Love" by "Missy Lynn Scraps" and can be purchased here.
Mask(s): Mask of choosing.
Font(s): The NautiGal

Here we go!

Open a new image, 600x600 (we can resize later), flood fill with white.

Open frame1 - Copy, paste as a new layer, resize to your liking, rotate depending on what tube you are using.

Open paper1 - Click inside of frame1 with your magic wand, expand selection by 5, add new layer, floodfill, move layer underneath frame.

Add a new layer, floodfill with paper1, apply mask of choice, merge group, move to bottom.

Open a variety of elements - copy, paste as a new layers, resize to your liking, and arrange. I started with the books and finished with the greenery.

At this point, I usually resize if I need a smaller image. I also save both the original size and the smaller size images.

Open tube of choice - copy, paste as a new layer, resize if necessary, duplicate, add gaussian blur of 3 to top layer, change blend mode to multiply, change opacity to 48.

Add a new vector layer for your name.

Go back through to sharpen and add a drop shadow to your layers.

Add your copyright as the finishing touch.

Save your tag in your favorite format and you are done!!

This tutorial was written by Debbie (Mystic Inc Design), 2009. Any resemblance to any other tutorial is purely coincidental and not intended.
Related Posts Plugin for WordPress, Blogger...