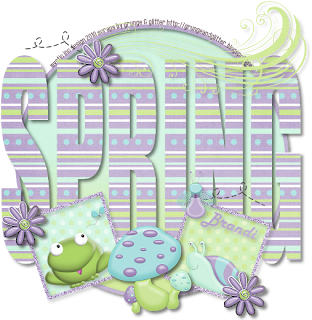
This tutorial was written for those that have a working knowledge of PSP (I use Version 9).
Images are included in the kit.
Supplies Needed:
Tube or image of choice
Scrap Kit: "Playful" by Grunge & Glitter and can be purchased here.
Template: Melissa's Creations #22, you can find it here.
Font(s): Harlow Solid Italic
Here we go!
NOTE: Open all the papers that you are going to use and resize to 500x500 pixels.
Open template 22, Shift + "D" to duplicate to a new image. Close original template and go ahead and "Save As" your new template to your desired folder. Turn off copyright layer and move to bottom.
In your layer window, select circle, Select All, using magic wand, select circle, add new layer, flood fill with paper 12, deselect, delete original layer.
In your layer window, select circle frame, Select All, using magic wand, select frame, add new layer, flood fill with paper 8, deselect, delete original layer.
In your layer window, select spring, Select All, using magic wand, select spring, add new layer, flood fill with paper 5, deselect, delete original layer.
In your layer window, select square frames, Select All, using magic wand, select small circle, add new layer, flood fill with paper 8, deselect, delete original layer,apply noise 50%, uniform & monochrome selected.
In your layer window, select squares, Select All, using magic wand, select squares, add new layer, flood fill with paper 11, erase one, add new layer, flood fill other one with paper 9, erase the other one so the green shows through, deselect. Go back to original square layer, Select All, using magic wand, select squares, add new layer, flood fill with paper 2, deselect, delete original layer. Lower opacity of this layer to around 50.
In your layer window, select swirl brush, Select All, using magic wand, select swirl brush, add new layer, flood fill with paper 11, deselect, delete original layer.
Delete gray flowers layer.
Open your tube or image of choice - Copy and paste, arrange and resize to your liking, mine are rotated 21 degrees.
Copy and paste any other elements that you would like to use, resizing and rotating as you go.
At this point, I usually resize if I need a smaller image. I also save both the original size and the smaller size images.
Add a new vector layer for your text - (I floodfilled mine with paper 8.) To make it stand out, duplicate the layer, convert bottom layer to raster, drop shadow first with white, then add another drop shadow in black.
Go back through to sharpen and add a drop shadow to your layers.
Add your copyright as the finishing touch.
Save your tag in your favorite format and you are done!!
This tutorial was written by Debbie (Mystic Inc Design), 2010. Any resemblance to any other tutorial is purely coincidental and not intended.


0 Scribbles:
Post a Comment