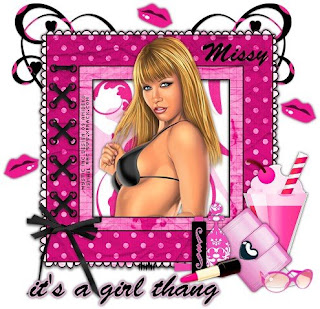
This tutorial was written for those that have a working knowledge of PSP (I use Version 9).
Artwork courtesy of Ismael Rac and you can find him here. Please make sure that you have the appropriate Xeracx artist license to use the same tube as I do.
Supplies Needed:
Tube of choice
Scrapkit: "Its a Girl Thang" by "Missy Lynn Scraps" and can be purchased here.
Font(s): Brush Script STD
Here we go!
Open a new image, 600x600 (we can resize later), flood fill with white.
Open frame1 - Copy, paste as a new layer, resize if necessary.
Open paper8 - Using magic wand, select inside of frame1, expand by 10, add a new raster layer flood fill with paper8 having resized to your liking, move layer underneath frame1 layer.
Open doodle2 - Copy, paste as a new layer, resize rather small, place under the right hand corner of frame1, duplicate, mirror.
Open an assortment of elements - Copy, paste as new layers, resize to your liking, some may need mirrored or rotated depending on which elements you chose.
At this point, I usually resize if I need a smaller image. I also save both the original size and the smaller size images.
Open tube of choice - Copy, paste as a new layer, resize if necessary. I used the eraser to erase right at the inner frame line.
Add a new vector layer for your text, duplicate, move duplicated later underneath original, select all, use magic wand to select text, expand by 2, floodfill with #EDAED6.
Add a new vector layer for your name.
Go back through to sharpen and add a drop shadow to your layers.
Add your copyright as the finishing touch.
Save your tag in your favorite format and you are done!!
This tutorial was written by Debbie (Mystic Inc Design), 2009. Any resemblance to any other tutorial is purely coincidental and not intended.


0 Scribbles:
Post a Comment