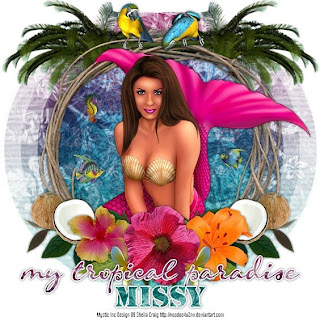
This tutorial was written for those that have a working knowledge of PSP (I use Version 9).
Artwork copyright to Sheila Craig (FTU) which can be found here.
Supplies Needed:
Tube of choice
Scrapkit: "Tropical Paradise" by Missy Lynn Scraps and can be purchased here.
Mask: by Vix (11), you can get it here.
Font(s): Scrap Cursive & Stencil
Here we go!
Open a new image, 600x600 (we can resize later), flood fill with white.
Open paper6 - Copy, paste as a new layer, apply Vix mask 11, merge down.
Open frame1 - Copy, paste as a new layer, resize to your liking.
Open paper 12 - Click inside of frame 1 with your magic wand, and while holding down the shift key, highlight all the parts in the frame that you would like to floodfill, when you have all the areas selected, floodfill, adjust blend mode to multiply, move under frame1 layer.
Open palm tree - Copy, paste as a new layer behind the frame layer, resize to your liking, duplicate, mirror.
Open parrots - copy, paste as a new layer, resize to your liking, arrange between the palms.
Open tube of choice - copy, paste as a new layer, resize to your liking.
Open several flowers and accessories - copy, paste as a new layer, resize and arrange to your liking. If you'd like to have fish in your "water" go ahead and add a few of them too!
At this point, I usually resize if I need a smaller image. I also save both the original size and the
smaller size images.
Add a new vector layer and create a line of text if you'd like. For this one, I used "Scrap Cursive" font and paper17, duplicate, convert bottom layer to a raster layer, select all, magic wand to highlight text, expand by 2, floodfill with white. I liked the darker color, so I duplicated the text layer again, convert to raster layer, change blend mode to multiply.
Following the same directions as above for the text layer, add a new vector layer for your name using paper17 and I selected the font "Stencil".
Go back through to sharpen and add a drop shadow to your layers.
Add your copyright as the finishing touch.
Save your tag in your favorite format and you are done!!
This tutorial was written by Debbie (Mystic Inc Design), 2009. Any resemblance to any other tutorial is purely coincidental and not intended.


0 Scribbles:
Post a Comment