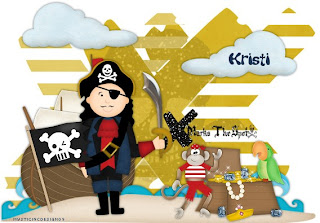
This tutorial was written for those that have a working knowledge of PSP (I use Version 9).
Supplies Needed:
Tube of choice: I am using one that is included in the kit.
Scrapkit: "Walk the Plank (boy)" by "Kristi W" and can be purchased at ScrappinDivas.
Filter(s): Alienskin Xenofex Constellation
Mask(s): by Vix (105), you can get it here.
Font(s): Thickhead
Here we go!
Open a new image, 600x600 (we can resize later), flood fill with white.
Open paper4 - copy and paste as a new layer, apply Vix mask 105, merge group. Select all, copy and paste skull 2 as a new layer, invert, delete on skull layer, lower opacity to 14%.
Open water - copy, paste as a new layer, resize to 30% arrange to left, duplicate, arrange to right.
Open sand - copy, paste as a new layer, resize to 90%.
Open ship - copy, paste as a new layer, resize to 50%.
Open treasure - copy, paste as a new layer, resize to 30%, arrange on right side.
Have Xenofex Constellation? If so, add a new raster layer, using your freehand tool, draw an abstract shape above your gold, flood fill with white, add Constellation at your chosen settings. I duplicated it a few times and moved it around, and also selected a star to add to each of the stones that were in the sand.
Open flag - copy, paste as a new layer, resize to 30%, and place in the sand, arrange on left side.
Open pirate2 - copy, paste as a new layer, resize to 50%.
Open wordart - copy, paste as a new layer, resize to 30%.
Open gem1 - copy, paste as a new layer, resize to 20%. Duplicate several times, rotating every other one.
Open monkey 2 - copy, paste as a new layer, resize to 30%.
Open parrot - copy, paste as a new layer, mirror, resize to 15%, place on treasure chest.
At this point, I usually resize if I need a smaller image. I also save both the original size and the smaller size images.
Add a new vector layer and create a line of text if you'd like.
Add a new vector layer for your name.
Go back through to sharpen and add a drop shadow to your layers.
Add your copyright as the finishing touch.
Save your tag in your favorite format and you are done!!
This tutorial was written by Debbie (Mystic Inc Design), 2009. Any resemblance to any other tutorial is purely coincidental and not intended.


0 Scribbles:
Post a Comment